Avant Garde Red and Chocolate Step-by-Step Eyeshadow Tutorial │ Capsule Makeup Collection
Avant Garde Red and Chocolate Step-by-Step Eye shadow Tutorial
Capsule Makeup Collection


Here is the final look in my Capsule Makeup Collection series. This makeup look very different from the others. I wanted to show an example of how you can still do created makeup even with a capsule makeup collection. Think of it like when an artist uses a limited palette (using 3-6 colors instead of more) to create a piece. This step-by-step tutorial is for someone that wants to try something new, to learn how to create more artistic looks, or someone that may wanna use this as costume makeup.
I imagine this is for the person is someone that wants to learn more about creative makeup, how to build out a makeup look, or someone that wants a challenge.
Let’s get onto the Avant Garde Red and Chocolate Step-by-Step Eye shadow tutorial! I’ll take you step by step showing you how I created this look, and also explain why I make some decisions to create the look.
Also the giveaway winner has been contacted, thank you so much if you participated!
Disclosure: Some of the links in this post are affiliate links and if you click them to make a purchase I will earn a small commission. I only link to companies and products that I enjoy and would recommend to you. The decision is yours, and whether or not you decide to buy something is completely up to you and thank you if you do use my links and help support me and my blog. This post contains products sent to me for consideration (PR) free of charge from the brand.

Let’s chat about how to go about creating a more Avant Garde or creative look before getting into the steps. I start off creative makeup looks like I would create a painting. What’s your inspiration? Do you have a color palette? A shape?
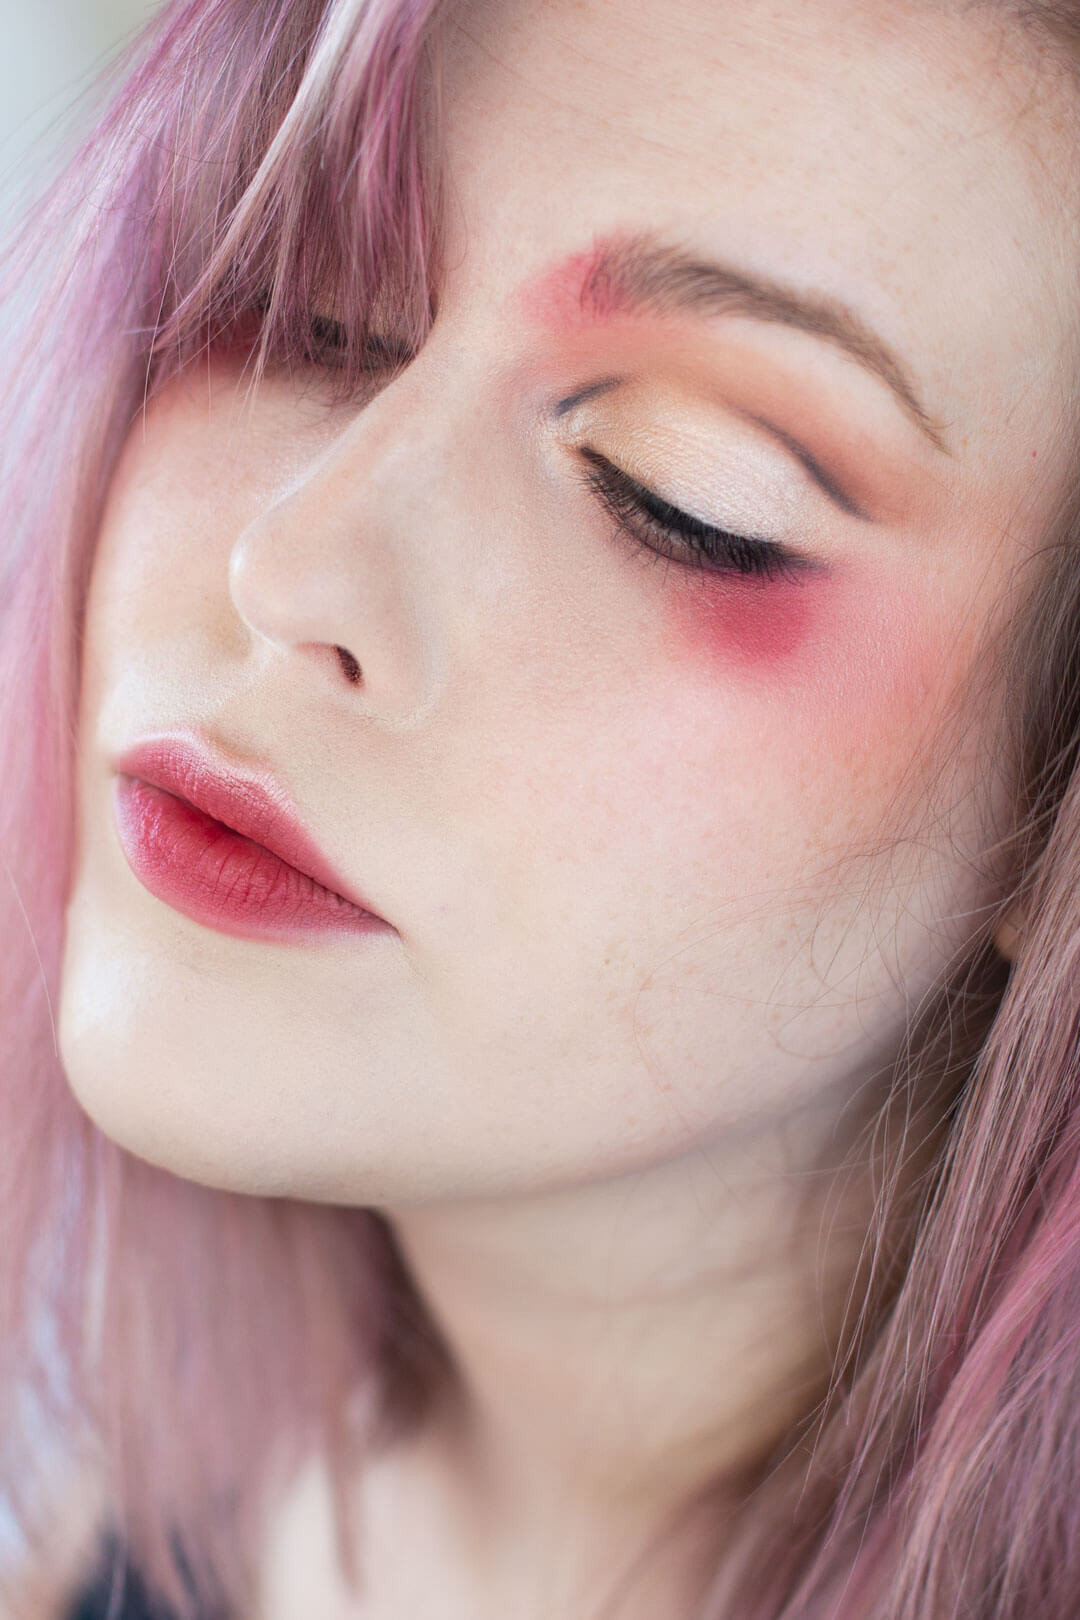
Our colors are limited so that makes it easy. I selected that red was going to be the dominate color. For inspiration, we played Julia the Chitty Chitty Bang Bang soundtrack the night before, so I liked the idea of doing a doll-like look, like the music box doll song about yearning. I wanted to evoke a sense of longing or melancholy while also creating large eyes and a lot of emphasis on the eyes. Inspiration can come from anywhere, even an annoying song stuck in your head!


Start of with priming your eyes! I am using the Smashbox 24 hour Photo Finish Eye Primer.
Use So Pale (off white warm cream, matte) from the In The Nude by Makeup Geek as a base shadow. Apply the eye shadow from the crease and blend up to the brow. I am using a S165 Cozzette brush to apply.


I am using Makeup Geek Luster highlighter applied with a Mac 242 to the mobile lid and just into the crease. I am really packing it on this time.


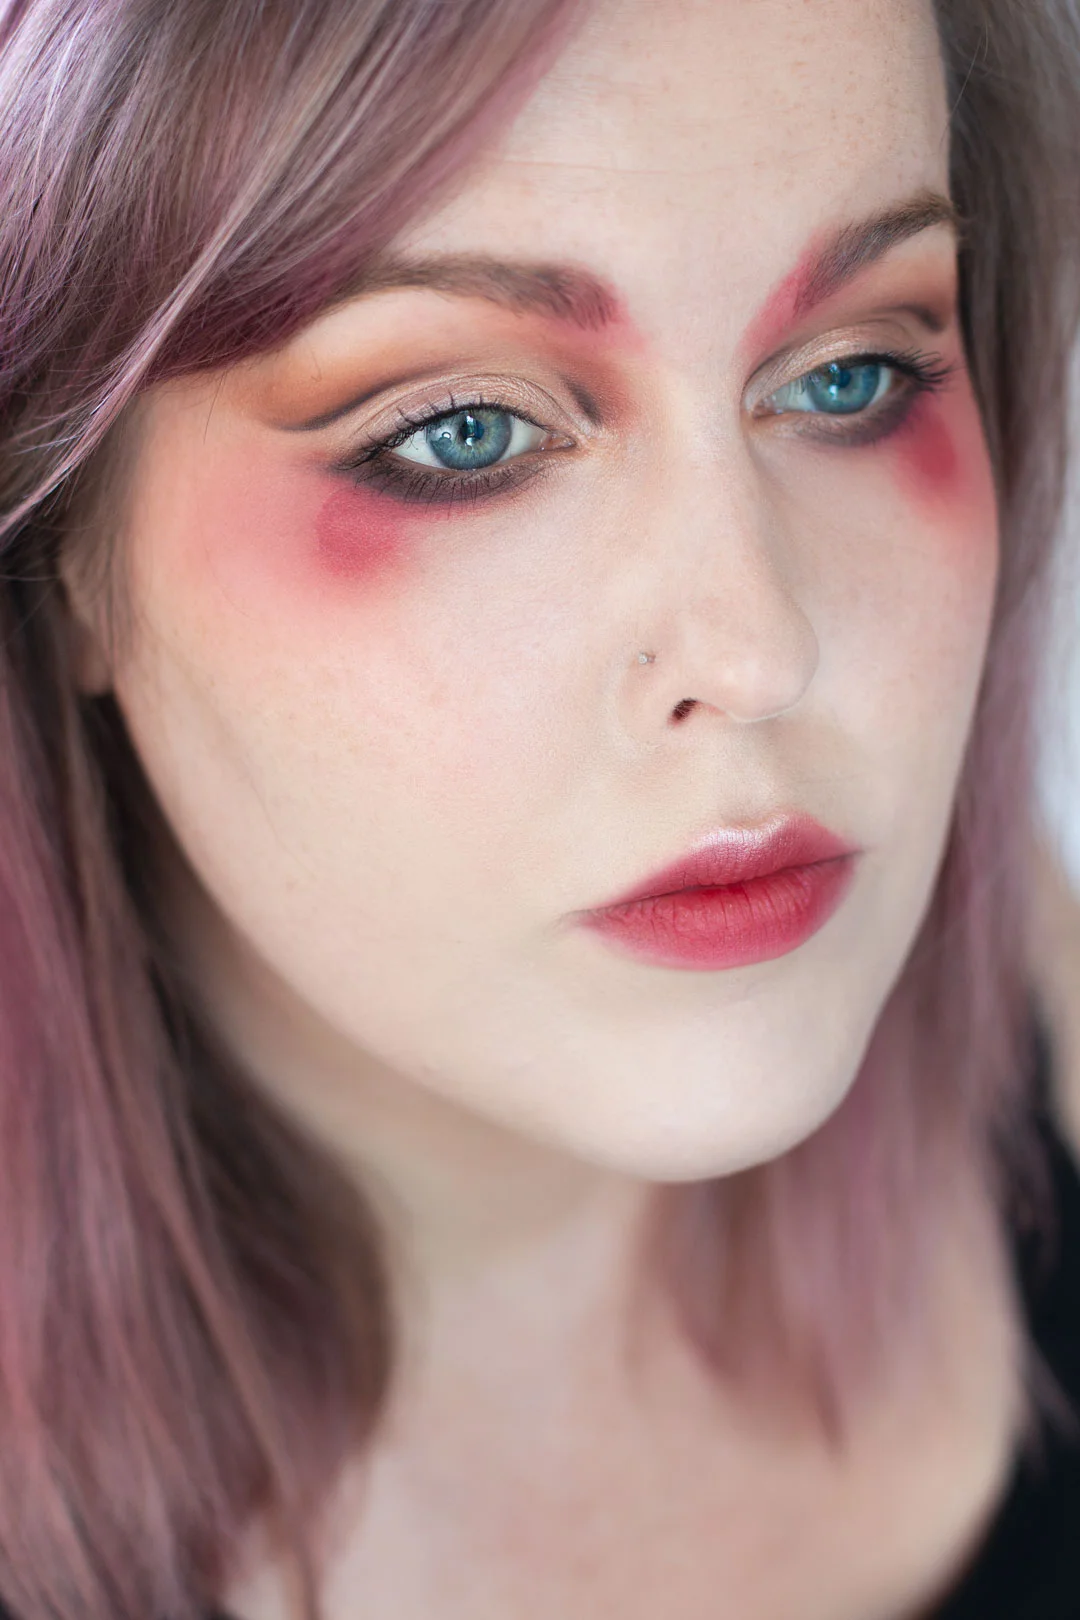
We’re just going to use the Makeup Geek Black Eye Liner to first sketch out where our graphic line will be. This look evolves a lot over the steps, but I want to keep the shape the whole time so I find sketching it out first helps. I am then taking a pencil brush and blending out the edges to prefect the curves of my lines.
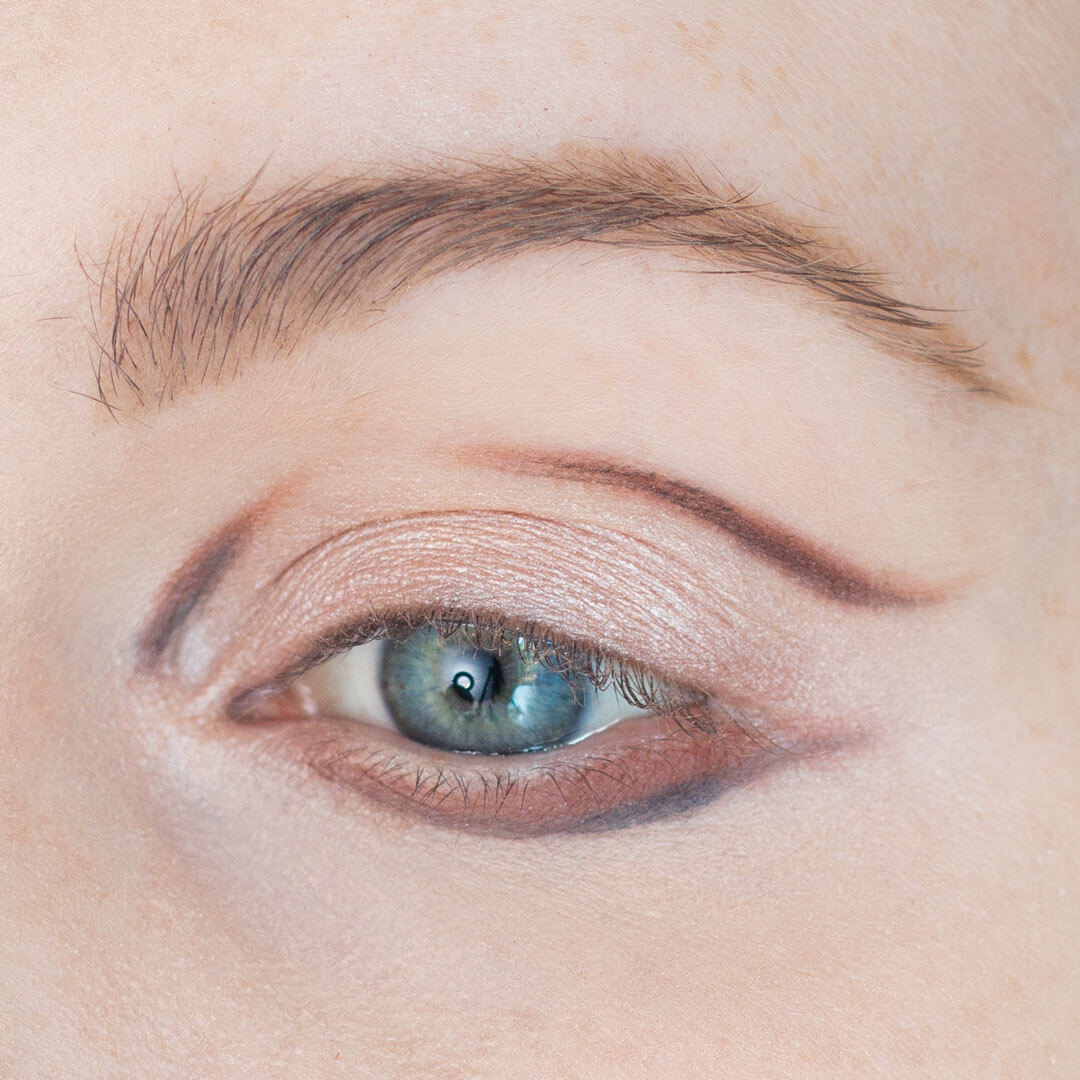
Now using a Sigma E30 again blend Dark Roast (matte, deep chocolate brown) from the In The Nude by Makeup Geek along the liner and just beyond. The inner corner should slant in along the orbital bone slightly and the crease line should slant up. I wanted to create this shape, as it is a similar shape that brows make when sad, to keep with the idea of yearning.
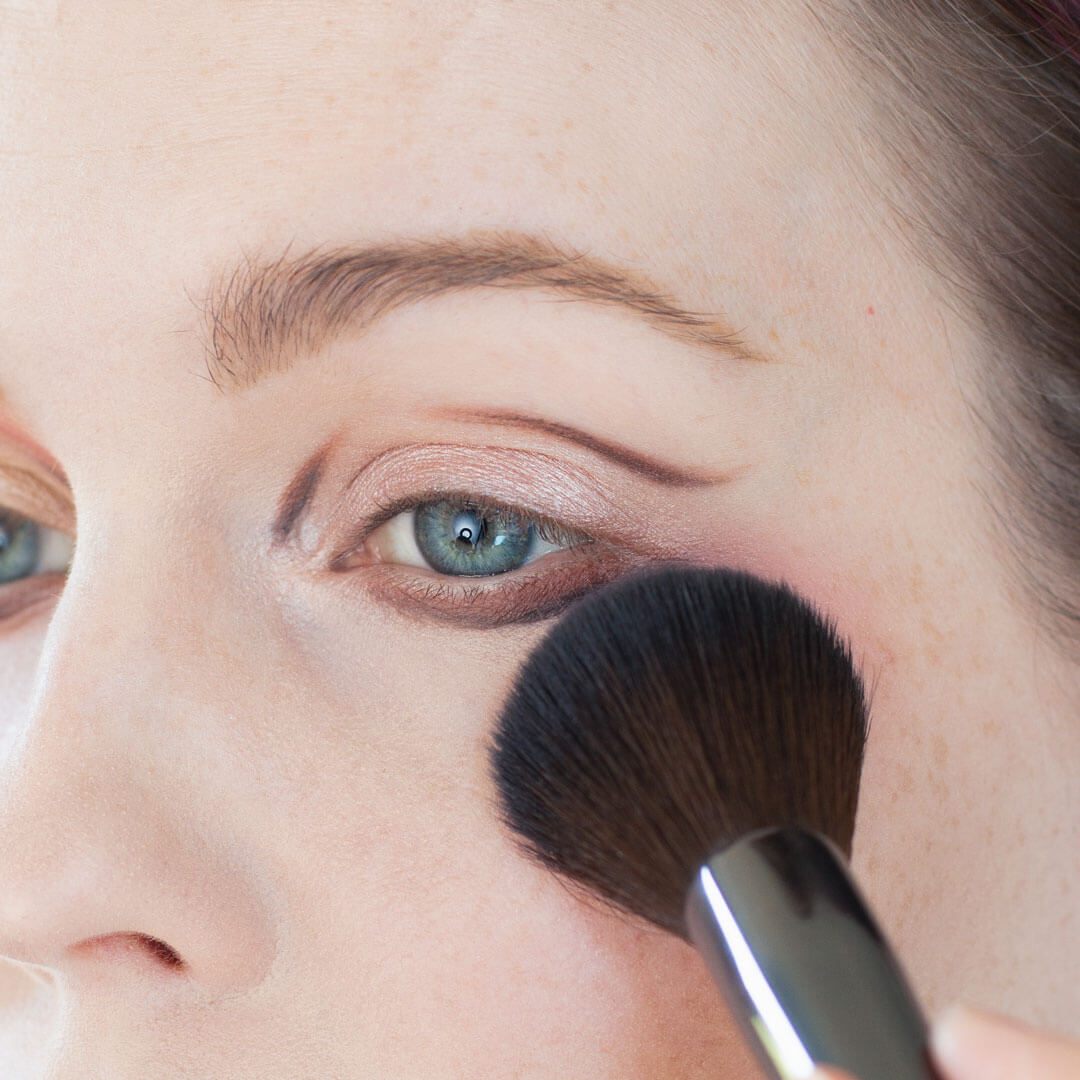

Plop a heavy amount of blush on the very top of your creak bone. I am using Makeup Geek Spellbound with a a Cozzette S130 that I really loaded up with pigment. I am applying by patting to get a more circular shape.


Add a bit more blush to the inner orbital bone. I am using a Cozzette S175 to apply.

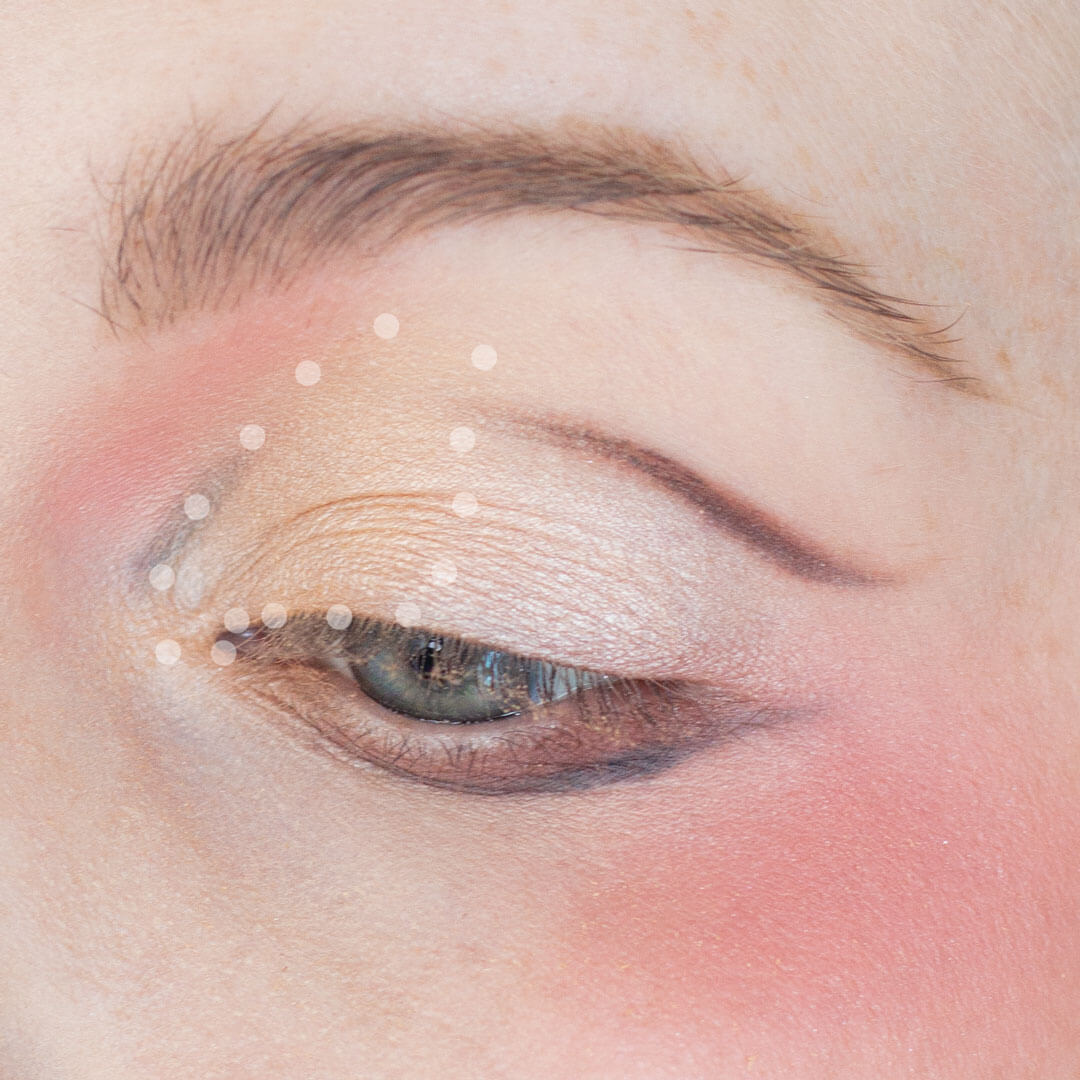
Now take So Pale from the In The Nude by Makeup Geek and apply with patting motions to really pack on the color. Place the color in a soft triangular shape following the graphic liner in the inner corner. Again, creating that “sad brow” shape.


I felt like I needed a transition to make the look more cohesive. If you have a deeper skintone than I do, you might not need this step.
Using a Cozzette S175 to apply Buffed (mid-toned peach brown, matte) from the In The Nude by Makeup Geek along the graphic liner on the upper lid blending into the temple. And applying it all the way to the blush on the lower lash line.

Now it’s time to clean up your lines. I just went over the liner to darken things up and get my lines a bit nicer before we finished the look.

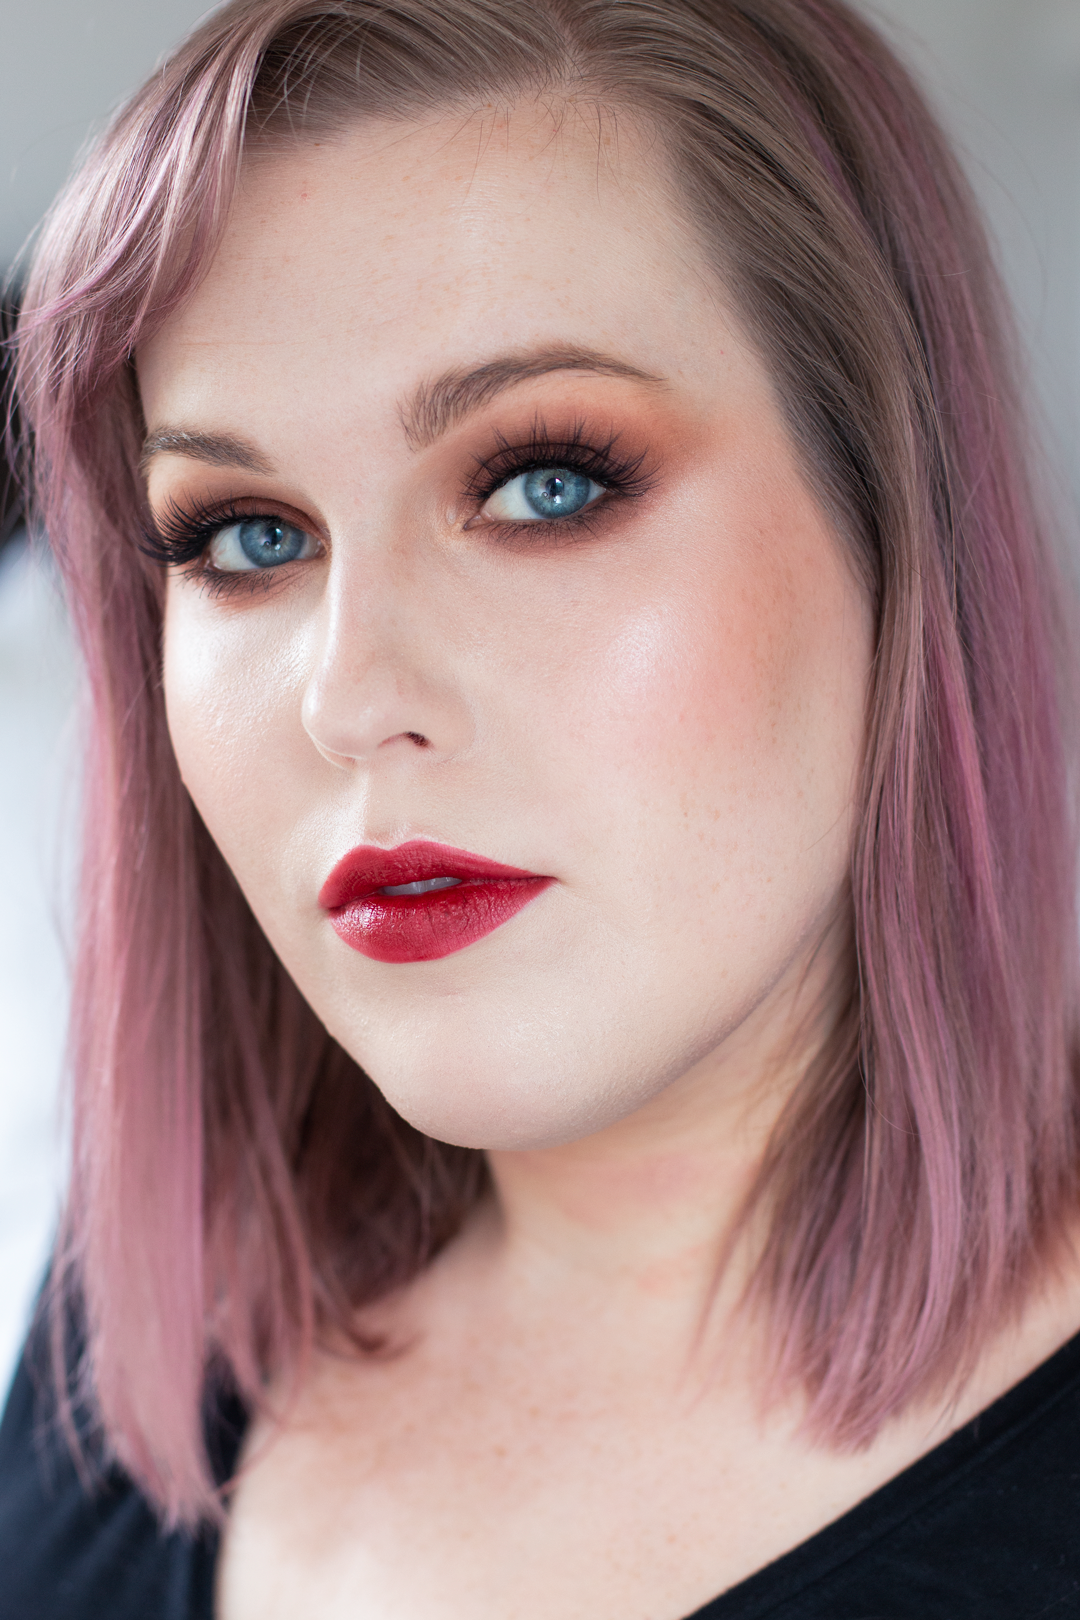
I am applying Butter London Fired Up right where we applied the blush. Heads up, this is a lipstick, so it’s probably not eye safe so use at your own risk and be mindful around your eyes. I use use my finger to pat a little on.

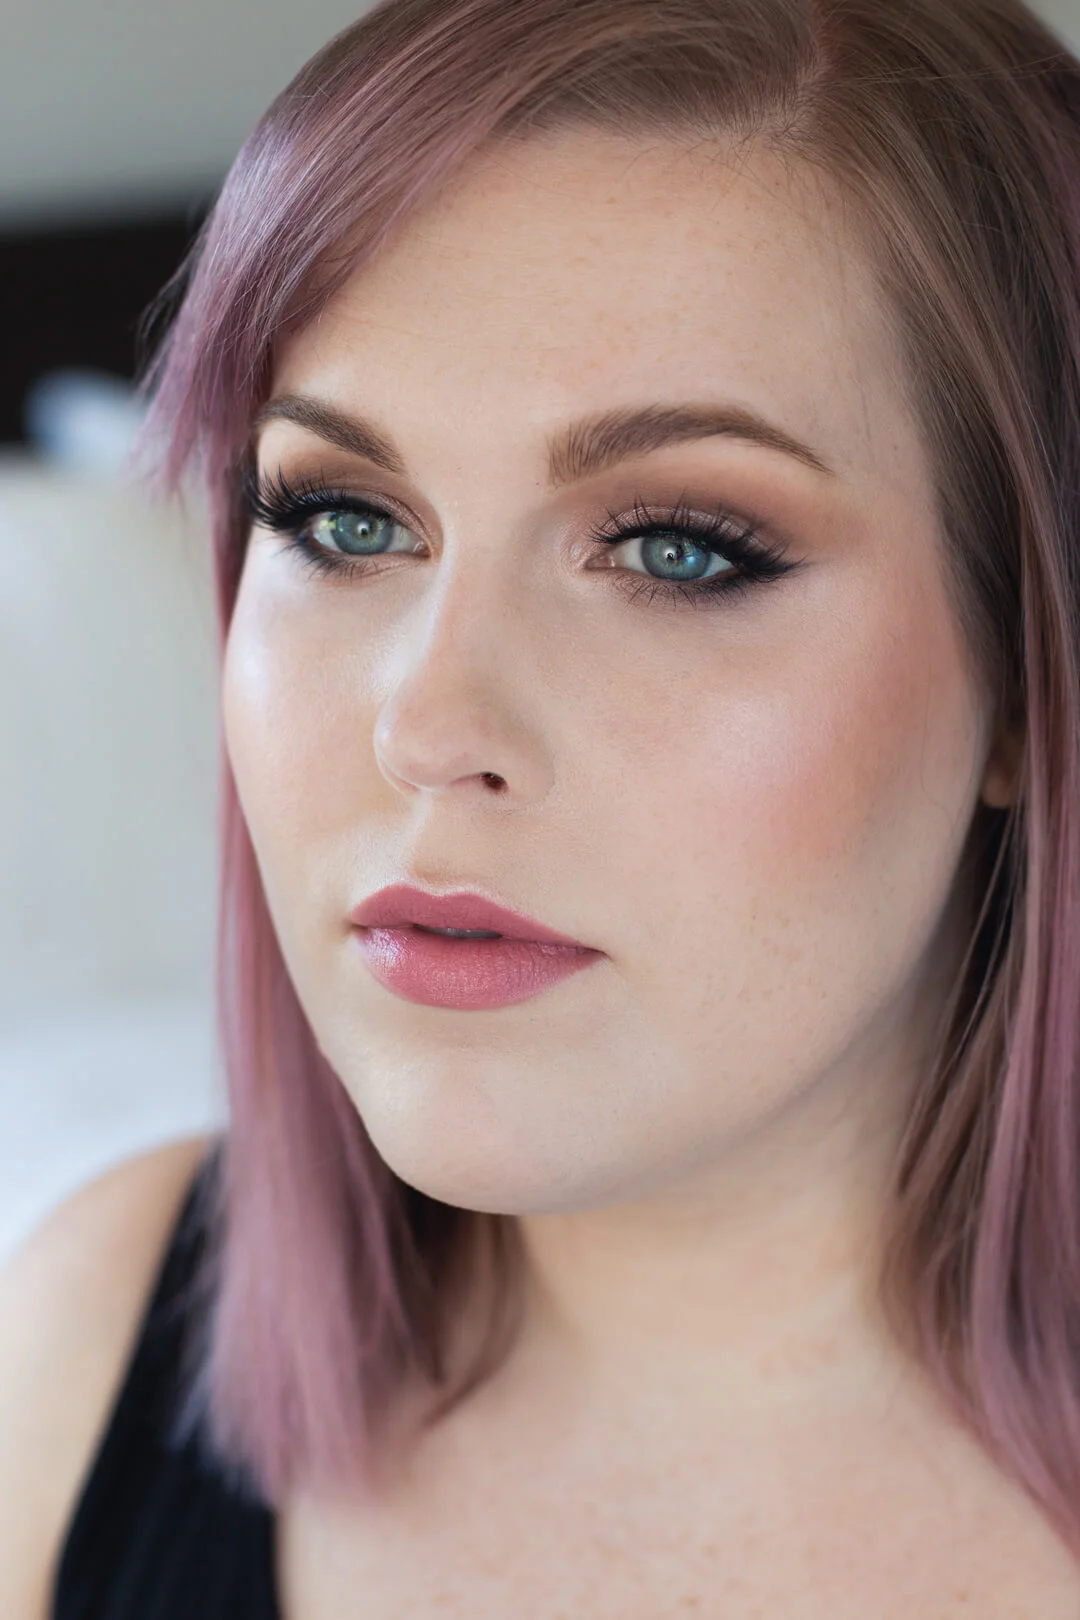
Curl your lashes and apply some mascara. I am using Maybelline Full N Soft Waterproof mascara. This could look cool with huge lashes too, but I really wanted the red to be the focal point.

I am applying Butter London Fired Up to my lips just inside my natural lip line. I am using a BH Cometics It’sMyRaeRae 7 pencil brush. If you have smaller lips/mouth you may go all the way to the perimeter of your lips. I wanted to make a small doll-like mouth.
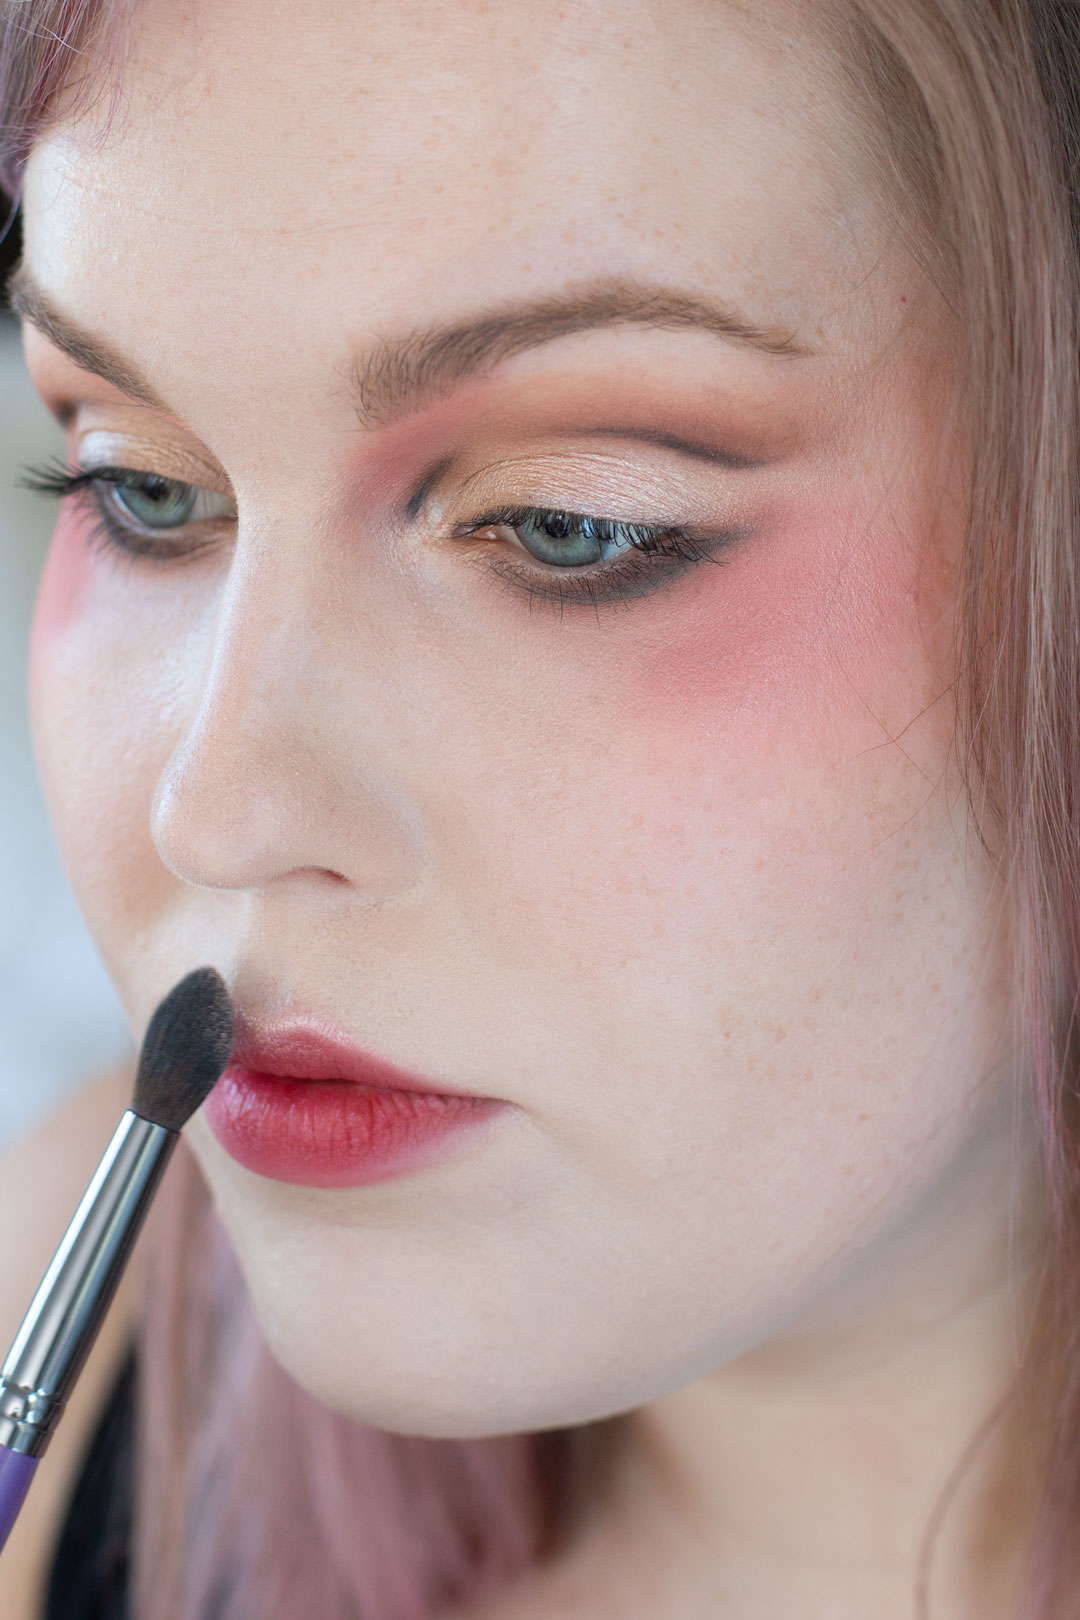
Apply the Makeup Geek Luster highlighter to the bridge on your nose and cupids bow. I am using a Cozzette S165 to brush to apply. I am applying more highlighter than I typically would to the cupids bow.
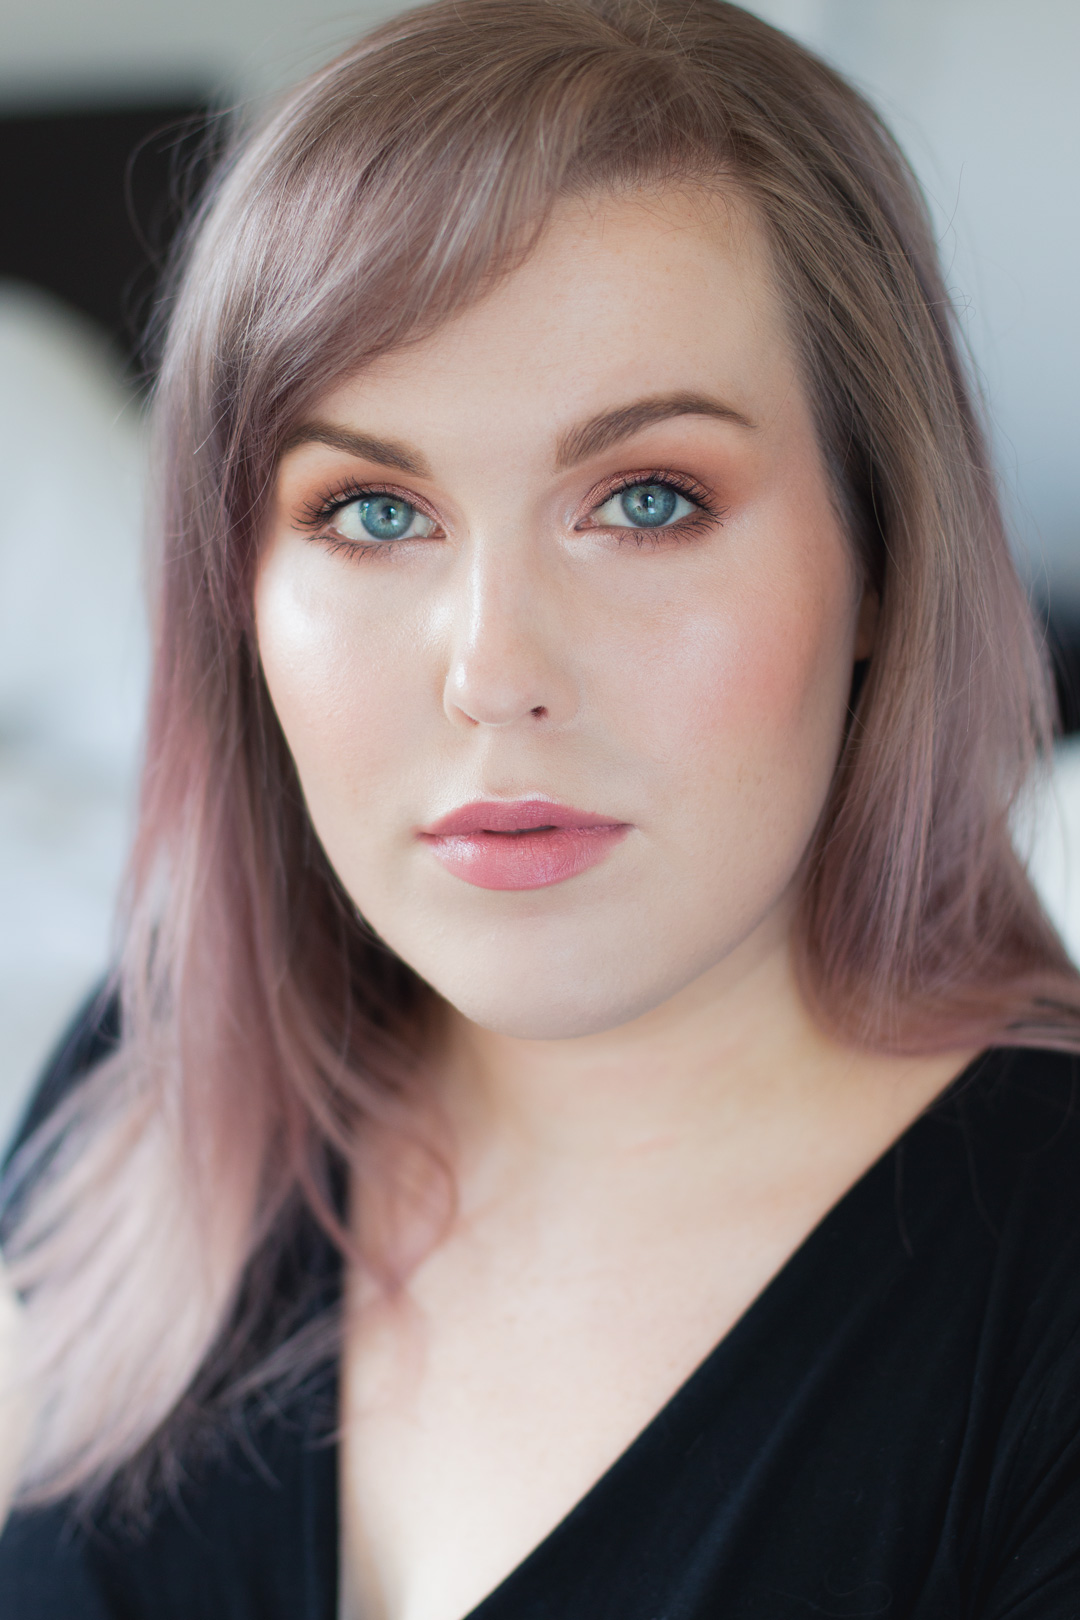
I also applied a generous amount of Urban Decay All Nighter Setting Spray to give my skin more of a soft look and blend the blush and creams together.


I am wearing items from my capsule makeup collection for this avant garde look. Check this post to see what 15 items I am using for all five of these tutorials. My Foundation is Cinema Secrets 601 I am wearing a very light amount for this look. My concealer is Make Up For Ever Ultra HD in 12 applied under eyes and around nose, with Pixi Brightening Peach to help with under eye darkness.
I hope you all liked this different kind of look and learned something about how to create your own more artistic look. I am always looking for inspiration prompts so feel free to comment with a prompt you’d like to see as a makeup look in the comments!
Did you miss any of the previous tutorials? Check them out!
How to Create a Capsule Makeup Collection
Daytime Easy Step-by-Step Eye shadow Tutorial Capsule Makeup Collection
Daytime Warm Step-by-Step Eye shadow Tutorial Capsule Makeup Collection
Night Out Glam Warm Step-by-Step Eye shadow Tutorial Capsule Makeup Collection
Step-by-Step Soft Smoky Liner Glamorous Eye shadow Tutorial Capsule Makeup Collection
I hope you all enjoyed this series. It was really fun to try something new and use a "limited palette” idea, but with makeup! Would you wanna use a capsule makeup collected all the time? What about for travel? What was your favorite look? Let me know in the comments!
-Rebecca