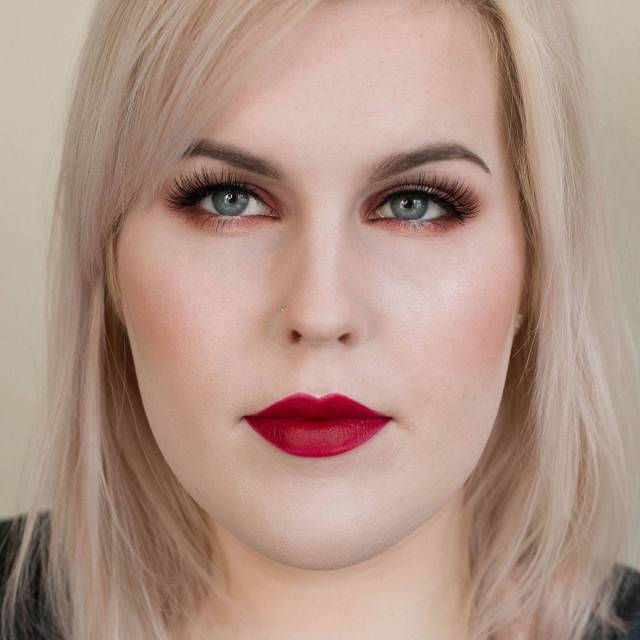
Orange and Copper Halo Eyeshadow Tutorial
This is one of my favorite color combinations to wear and also one of my favorite styles. Orange eyeshadows look great on blue eyes since orange is the complementary color to blue. This orange and copper halo eyeshadow tutorial will flatter blue eyes the most but will look nice on other eye colors, as well. (Check out my Champagne and Purple Halo Eyeshadow Tutorial if you want something perfect for green eyes or you just don't do orange.)
Disclosure: Some links below are affiliate links, some products were sent to me.
Start out by priming your eyes. I am using Mac Painterly Paint Pot today.
Add a base shadow which will help us blend out shadows later on. Choose an eyeshadow that is close to your skin tone and matte. I am using Mac Blanc Type (matte, off white) on a Sigma Large Fluff.
Now add a transition eyeshadow. This will give a nice transition between your skin and the colored shadows. I am using Mac Wedge (matte, neutral light brown) on a Hakuhodo J5522 and applying it from the crease, blending towards the brow and along the lower lash line.
Take Mac Red Brick (matte, red-copper) and start applying it to the outer quarter of the eyelid. I use a Hakuhodo J142 to apply and I apply it as a slight v shape.
Now we're going to repeat that color on the inner corner and also taking it along the outer quarters of the lower lash line. I use a Sigma E30 Pencil Brush to apply.
With the same pencil brush add a touch of Mac Brown Script (matte, burnt orange) to the very outer v.
Add some Makeup Geek Shimma Shimma to the center of the upper and lower lid. I use a Mac 242 to apply.
Add some of MAC Coppering (shimmer, red-copper) just on the edges of the Shimma Shimma on both lids. I use a pencil brush for this step.
I wanted to emphasize the halo effect even more so I used a brown liner on the outer and inner corners of the waterline and then a nude liner just in the center. I have also curled my lashes and added mascara.
Here's the finish looked with some lashes. I am wearing Velour lashes in Whispie Sweet Nothings.
I hope you like this look. I think it's very pretty, especially on blue eyes. If you want something less intense, go for more orange or gold coppers instead of the very red coppers I used today. Please let my know what other tutorials you'd like to see next in the comments below!
-- P R O D U C T S --- Products: Face: Makeup Forever Primer – 0 NARS Pro Prime MUFE HD foundation – 118 Illamasqua Skin base – white NARS Transparent Crystal Powder Nars creamy concealer – Chantilly Pixi Corrector – Brightening Peach NYX Matte Finish Setting Spray OCC John Doe Anastasia Contour Kit Hourglass Ambient Lighting Powder – Ethereal Blush: MAC Warm Soul Eyes: Mac Painterly Paint Pot Mac - Coppering, Brown Script, Blanc Type, Brick Red
Makeup Geek - *Shimma Shimma
NYX Liquid Black Liner Sephora Waterproof Pencil Piner in Banana Split Maybaline Fun n Soft mascara Mac Extended Play Gigablack Lash Mascara Anastasia Clear Brow Gel Anastasia Brow Powder Duo in Ash Brown Lips: Colourpop Bitchette Lashes: Velour Whispie Sweet Nothings
Brushes: Get 10% off Sigma blushes wit the code GLOWGETTER
Hakuhodo J5522
Hakuhodo J142 Mac 242
FTC Disclosure: Some links in this post are are affiliate links, some products were sent to me (these are marked with * in my product list). All other products were bought by myself, this post is not sponsored. Read my full disclosure statement.


