

Red and Mauve Modern Renaissance Eyeshadow Tutorial

Today's look is a fun red and orange eye look with a royal blue accent using the Anastasia Beverly Hills Modern Renaissance Eye shadow Palette. I wanted to create a eye shadow look using one palette, but give it a unique shape and flare since I know there are a lot of tutorials out there using this palette. I hope you like this look and if you wanna see how I created it just scroll down!

Let's get started!


Start out with a primed eye (Smashbox 24 Hour Photo Finish Eyeshadow Primer is my current go to) and I am applying Tempura from the crease to the brow very lightly to help with blending later on. I used a Sigma E50 to apply since it is large and can quickly get a base shadow down.

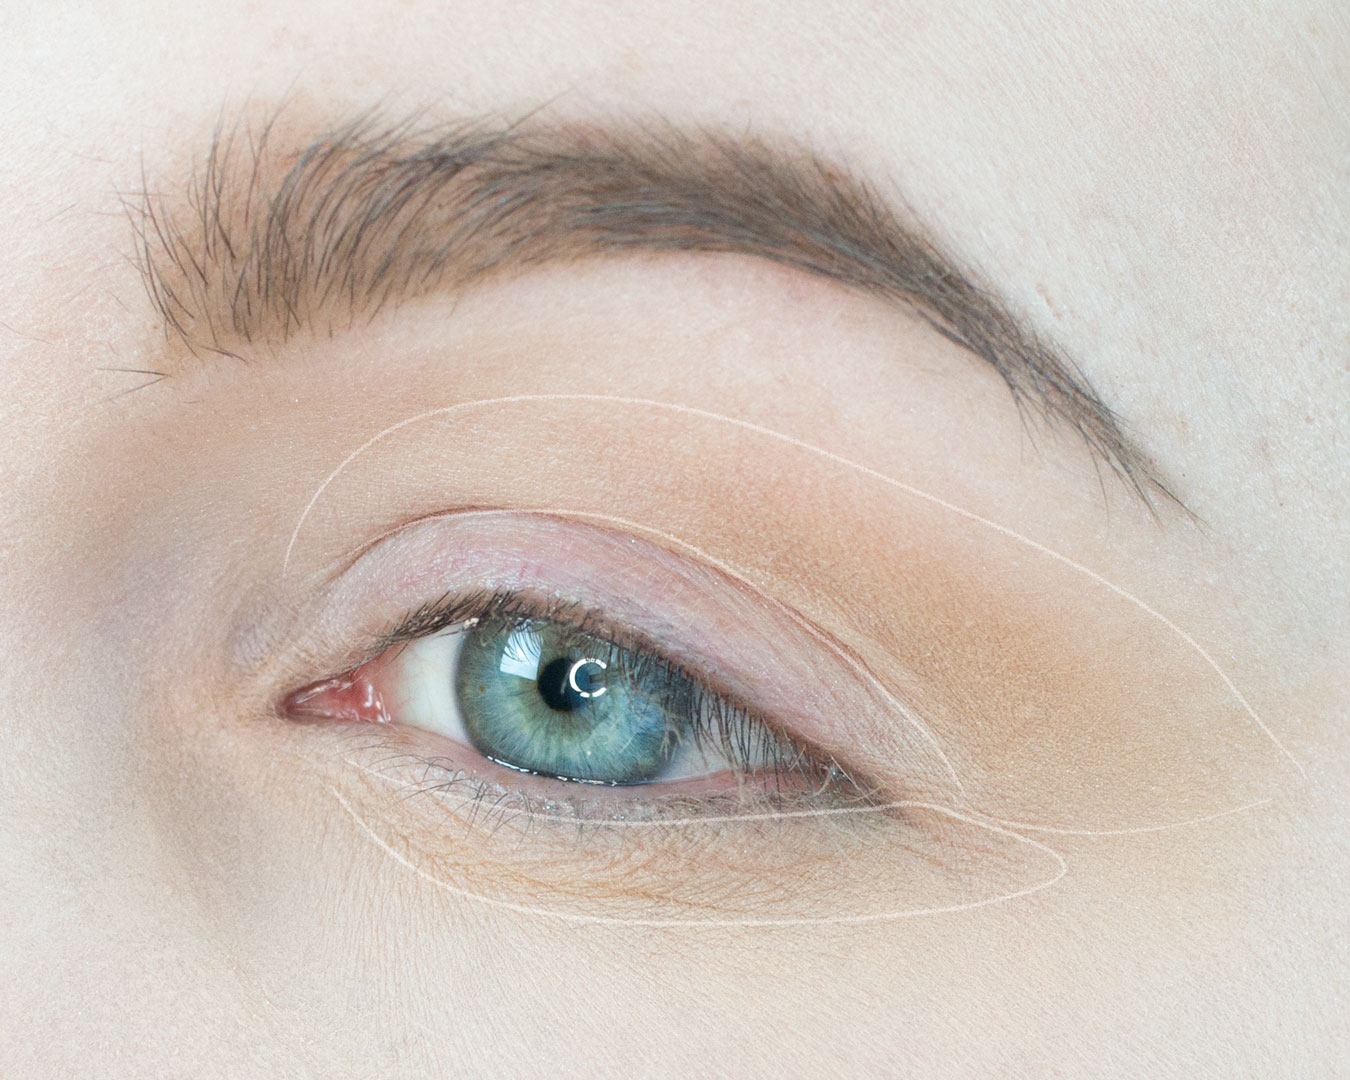
Lets start shaping the eye. Using a Sigma E40 I am blending Golden Ochre from the Modern Renaissance palette. Applying it to the crease and blending out to a point that ends at the tail of the brow. I am then still using the large brush and blending it under my lower lashes. I absolutely love this color and would love to see Golden Ochre as a single and it is just lovely as a transition color.
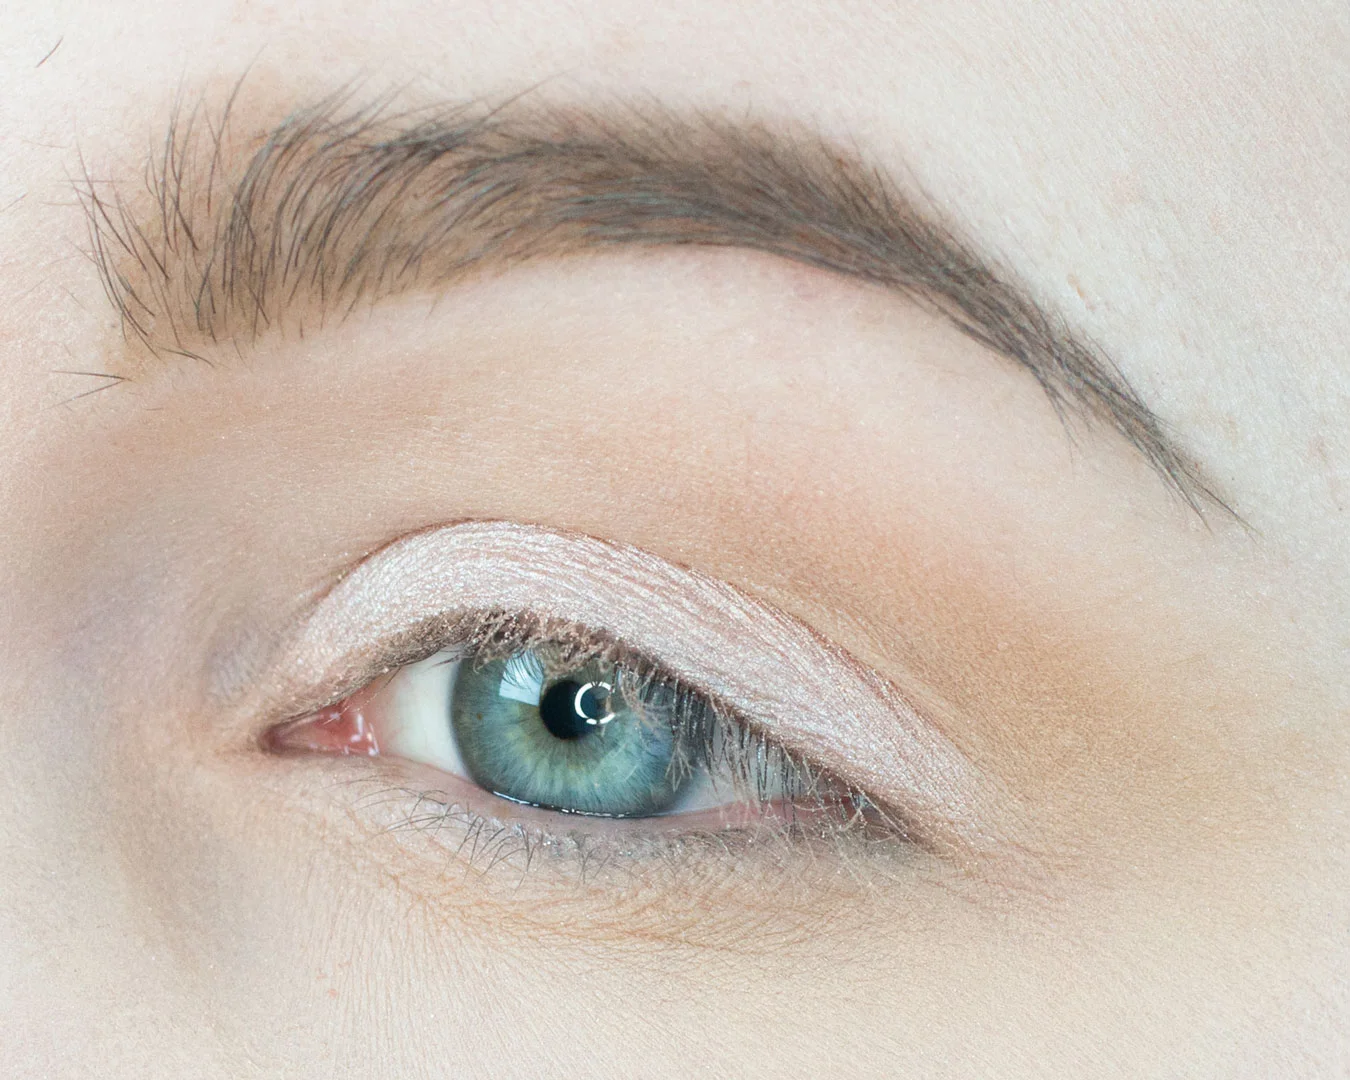

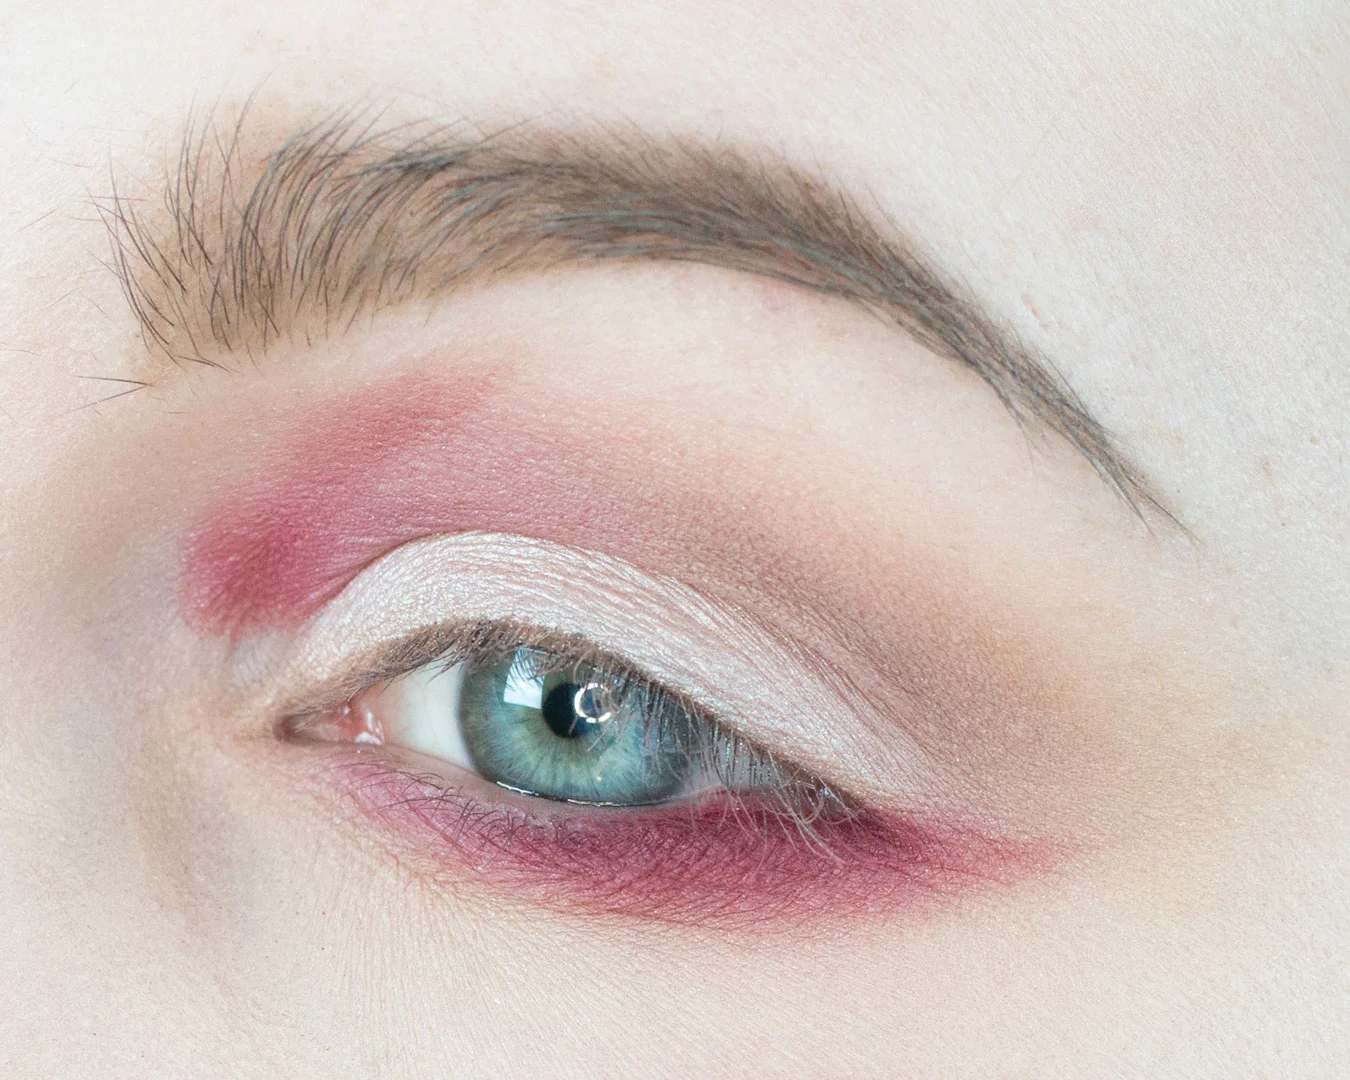
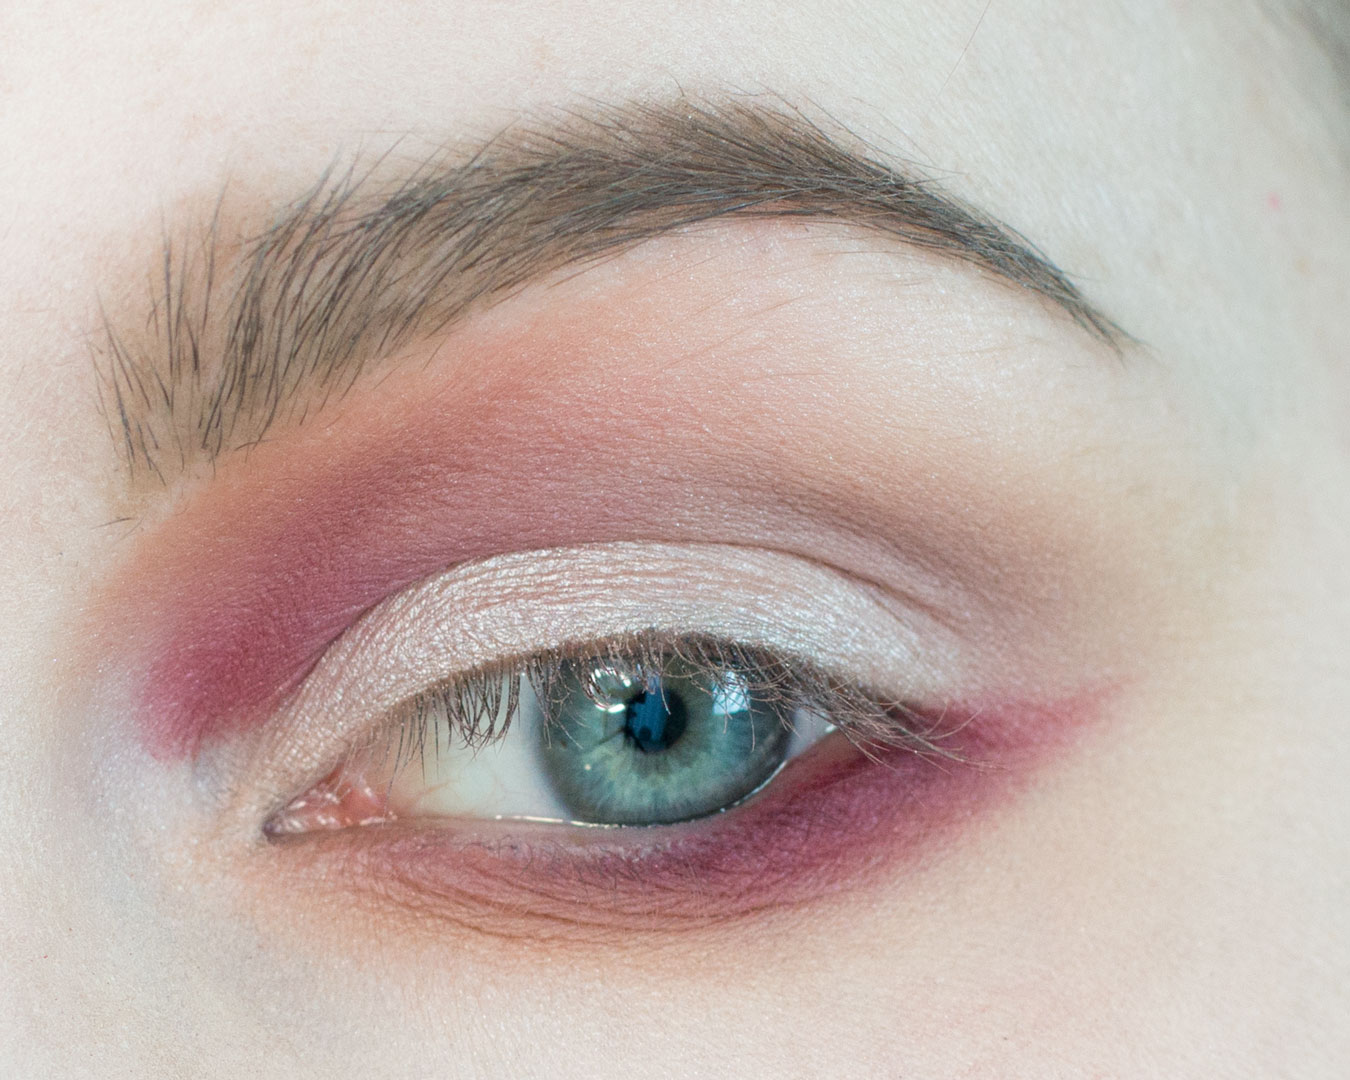
Now we are going to pat on a lid color. I am using Vermeer from the Modern Renaissance palette and patting it onto the lid with a Smith 253.
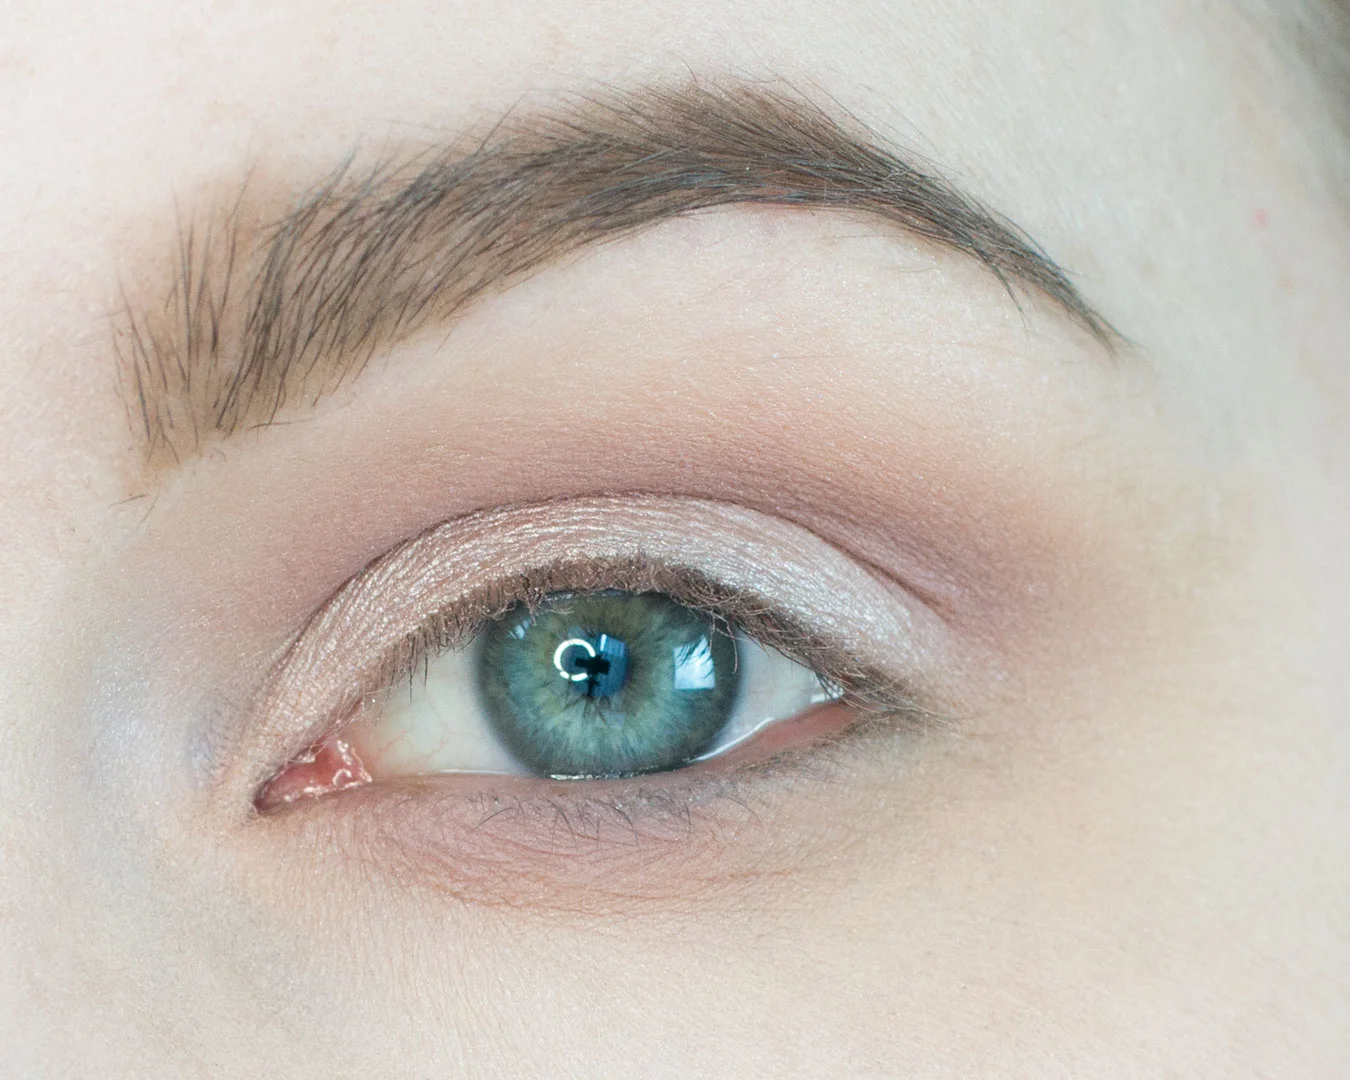
Now it's time to blend a cool tone into the crease, since we are blending the cooler, muted medium purple-mauve color Boun Fresco into the muted soft mustard of Golden Ochre you are going to want to use a small brush so you don't muddy the colors as you blend. I love to mix complementary colors (think of the pure hue of Boun Fresco and purple and Golden Ochre as yellow) to mute them and use them as a crease color, however you don't wanna muddy your transition color as you blend out the crease.
I am going to be adding Buon Fresco with a Hakuhodo J5529 to the crease, in the placement of the inner line. Then I am using a clean Simga E40 to blend the color just a touch so we have no harsh lines.

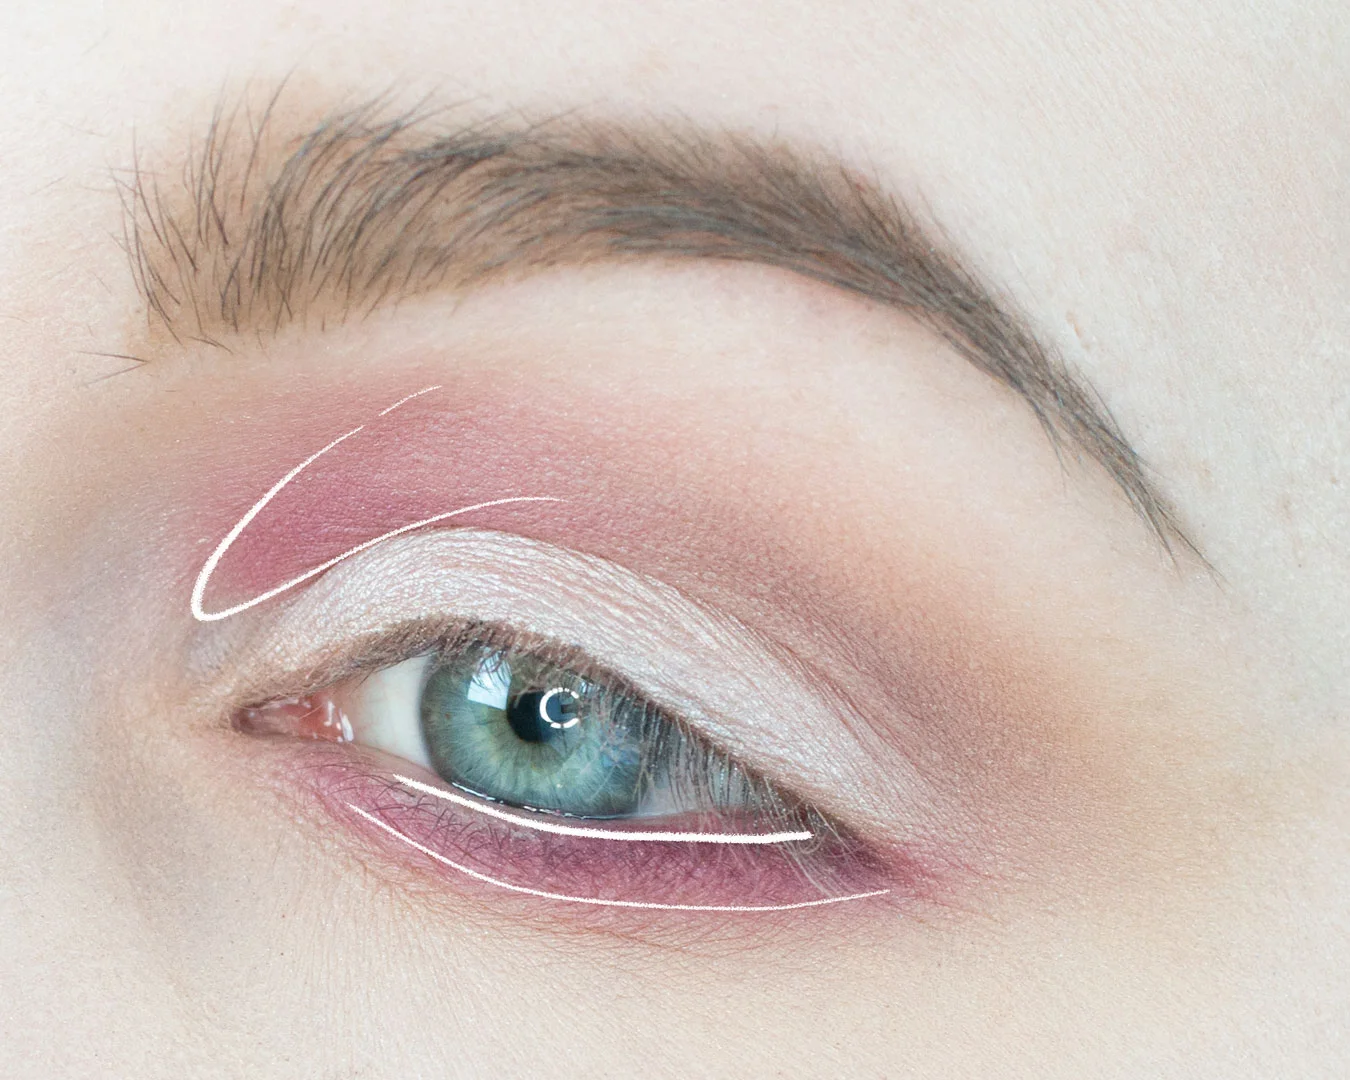
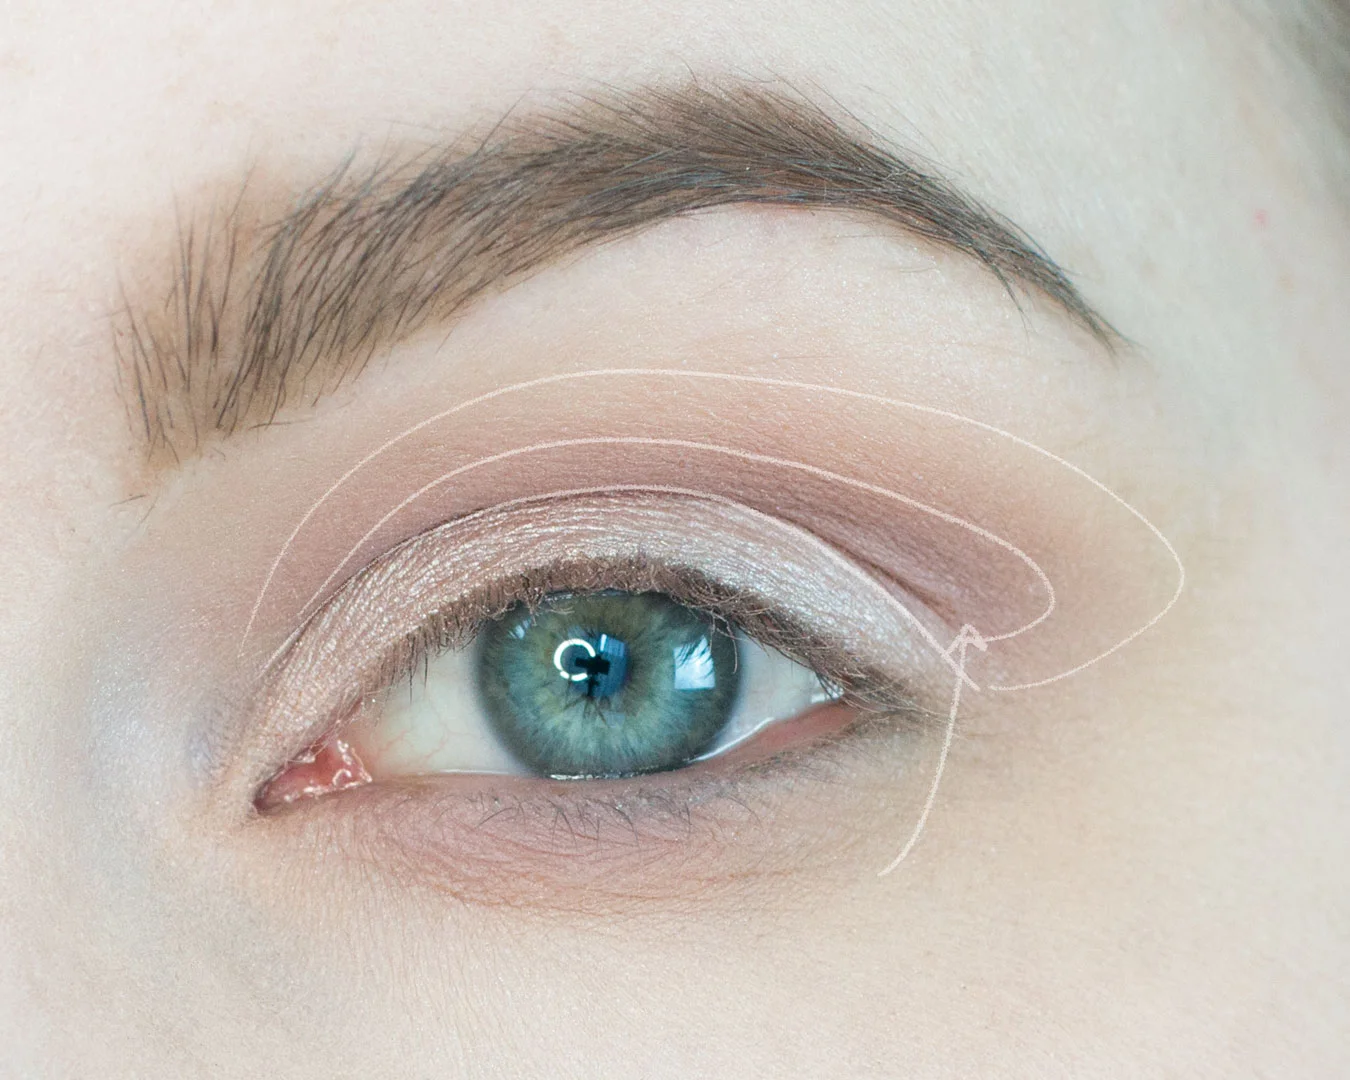
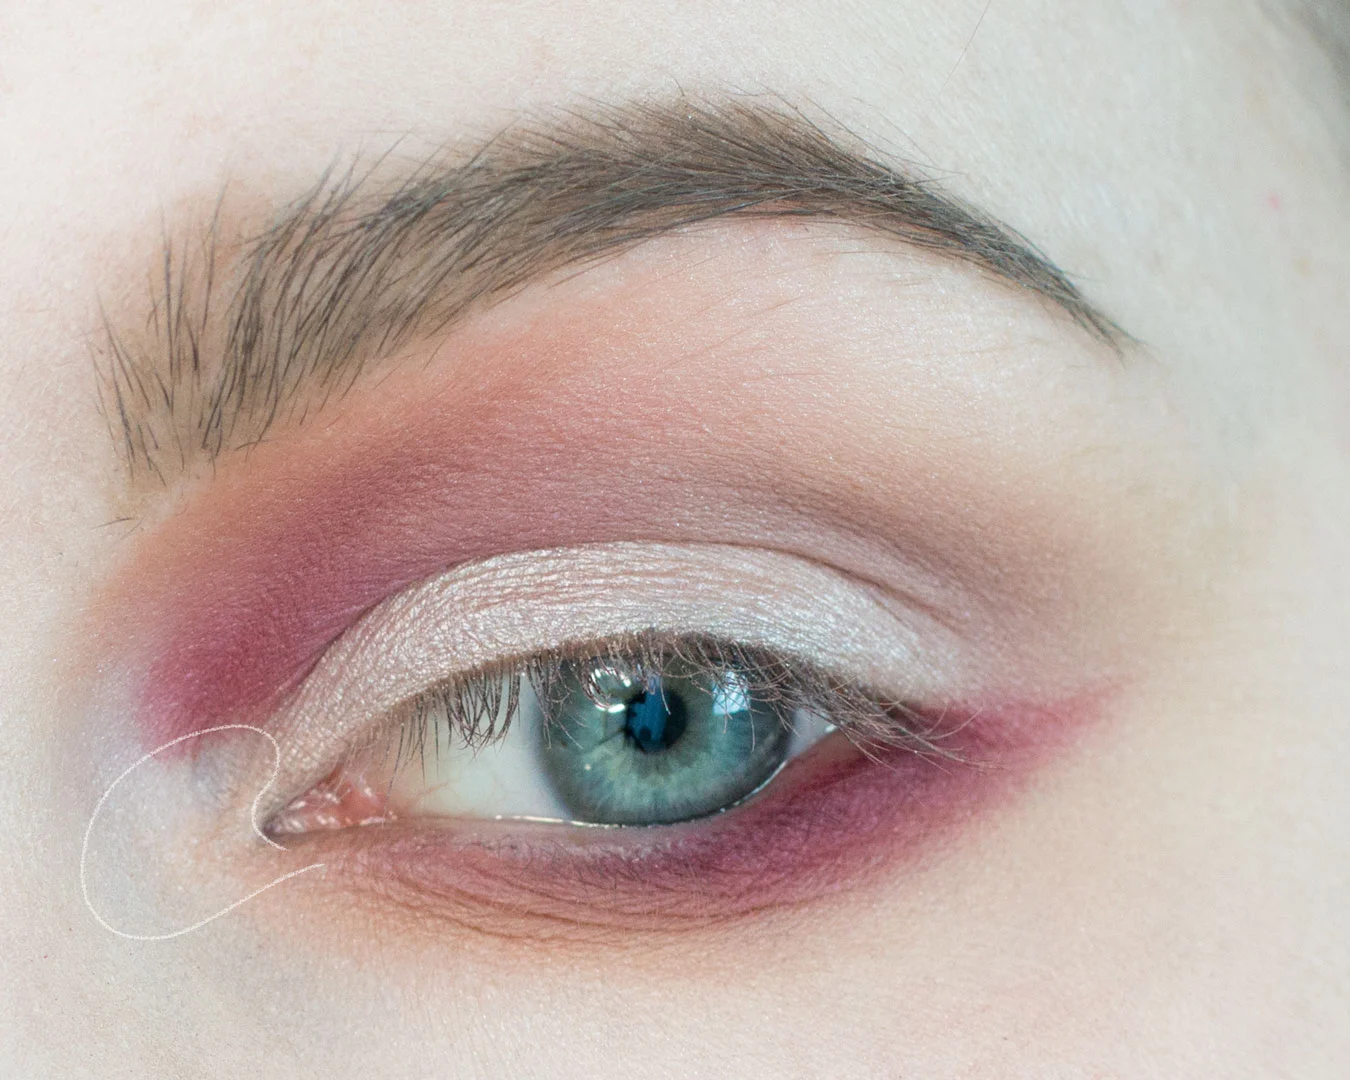
Now it's going to get fun! You may wanna refer to the photo with the lines on the right to better see placement. I am using the Hakuhodo J5529 with Love Letter from the Modern Renaissance palette. It's a stunning deep berry that's slight muted. Placing it in the contour of the orbital bone along your nose and then along the lower lashline.
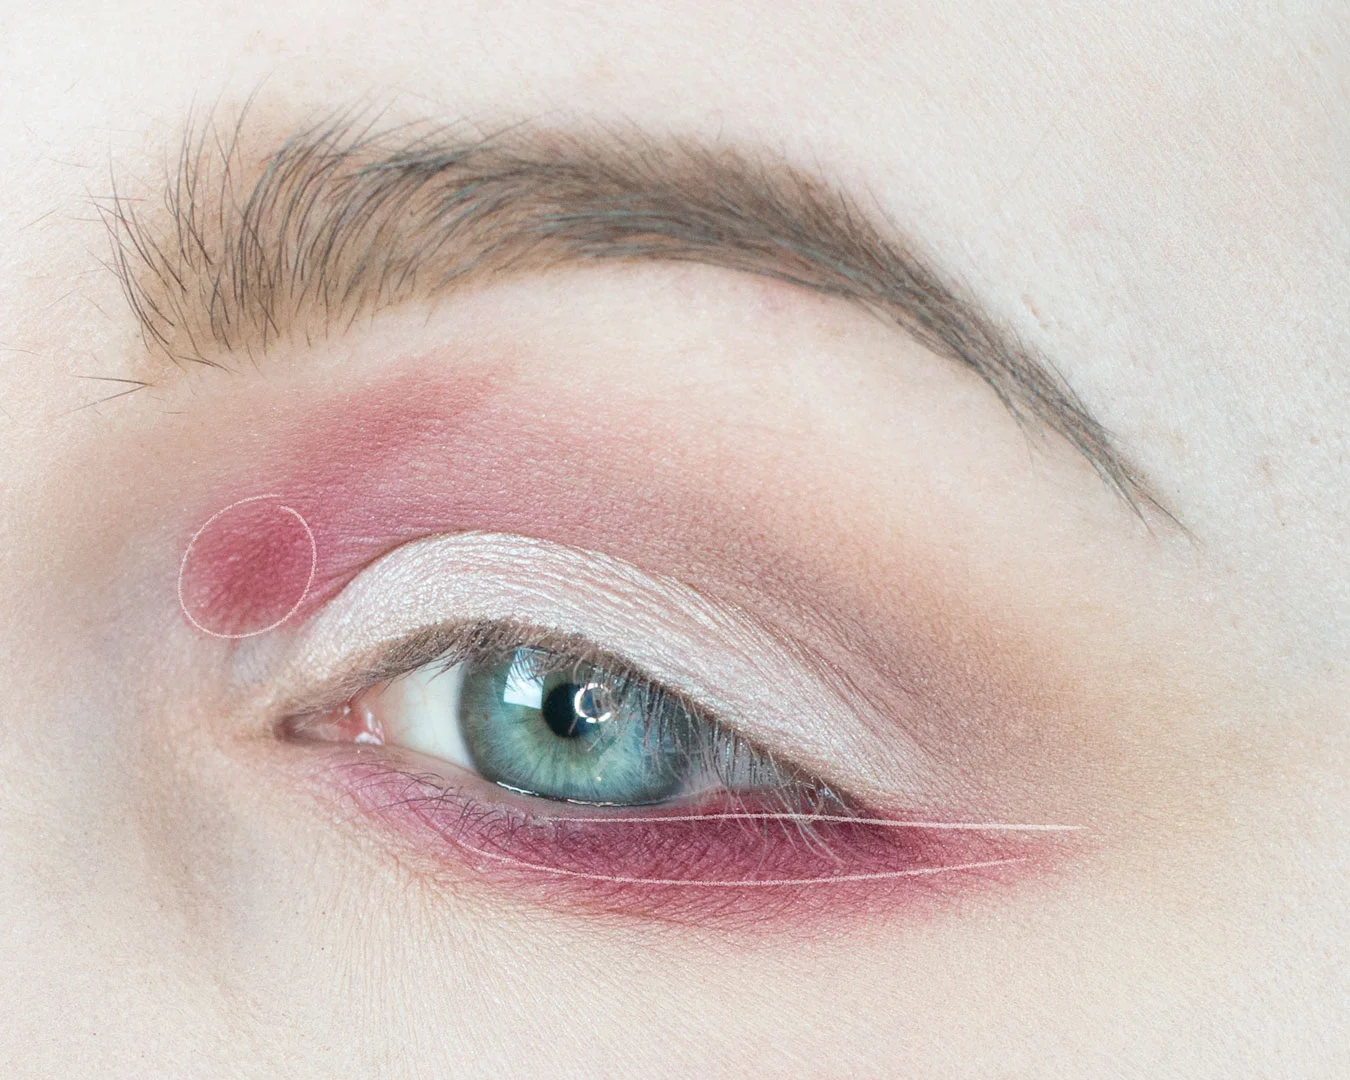
Using the Hakuhodo J5529 pick up a bit of Venetian Red from the Modern Renaissance palette and place a dot in the start of the swoop we did with Love Letter in the previous step. I place this shape by picking up the shadow lightly on the tip of the brush and then press where I want to place it and then twirl the brush to deposit the color. Then I run a bit along the lower lash line really close to the lash line.

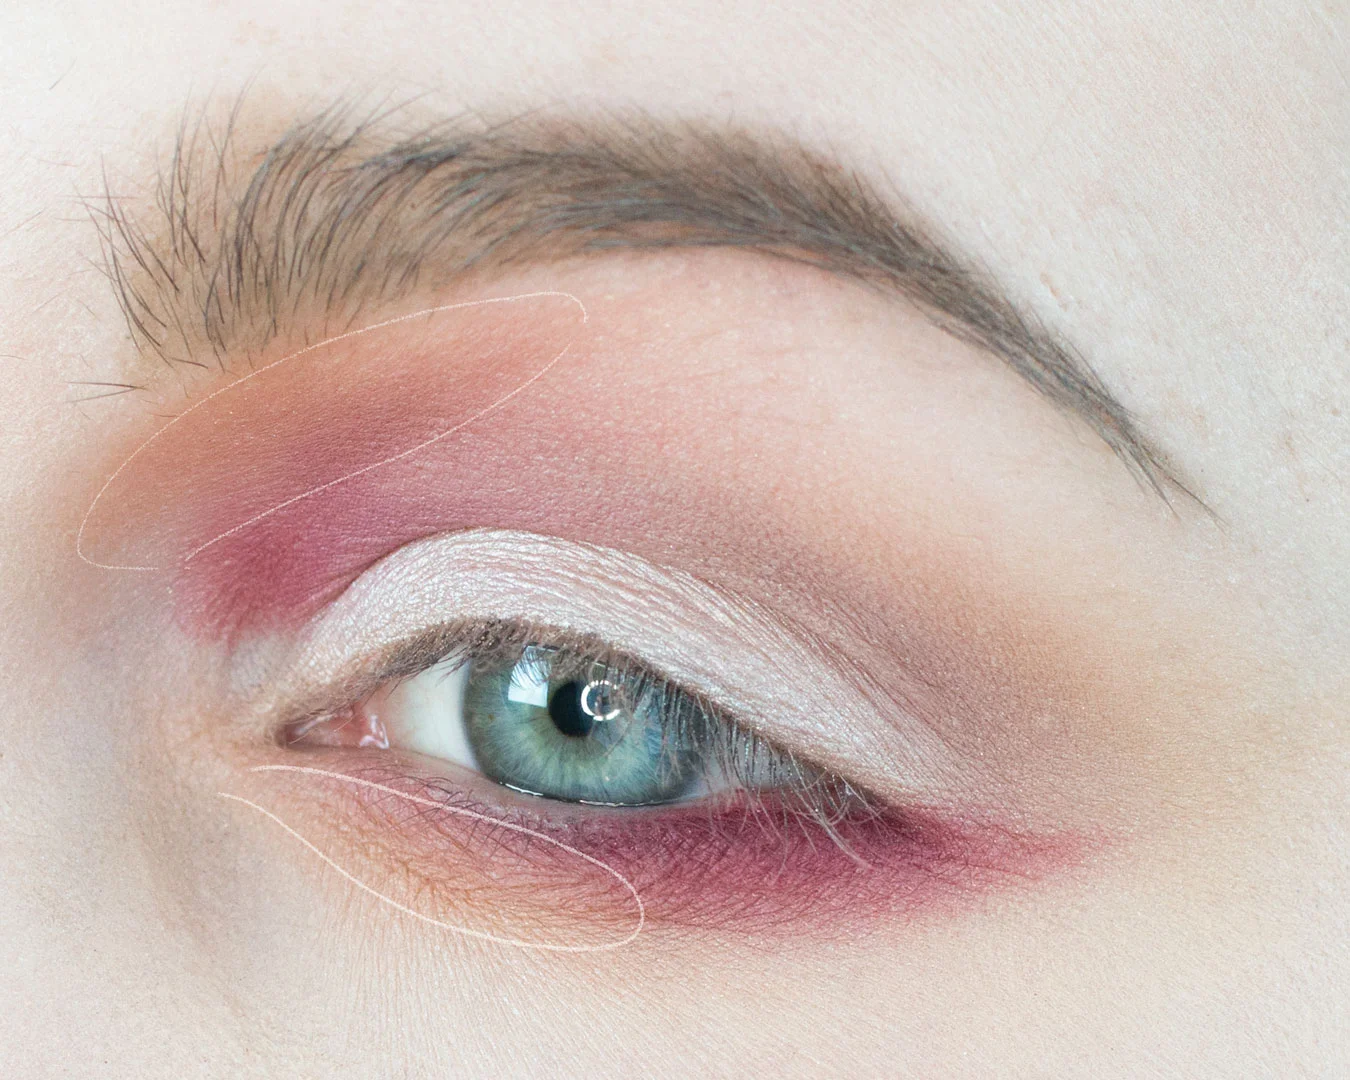
I didn't care for the red right against my skin, so adding a bit of Burnt Orange from the Modern Renaissance palette really tied the look together. I am using the Sigma E40 to lightly blend the color into the lower lashline where you have the empty space on the inner corner. I am then getting more product on the tip of the brush and blending it along the underside of the brow hugging the pink and red colors we applied earlier.
Now I am just adding a bit more Tempura from the Modern Renaissance palette with the Smith 253 brush to the inner corner to bring a bit more light to the area. Just pat a bit right in the corner.
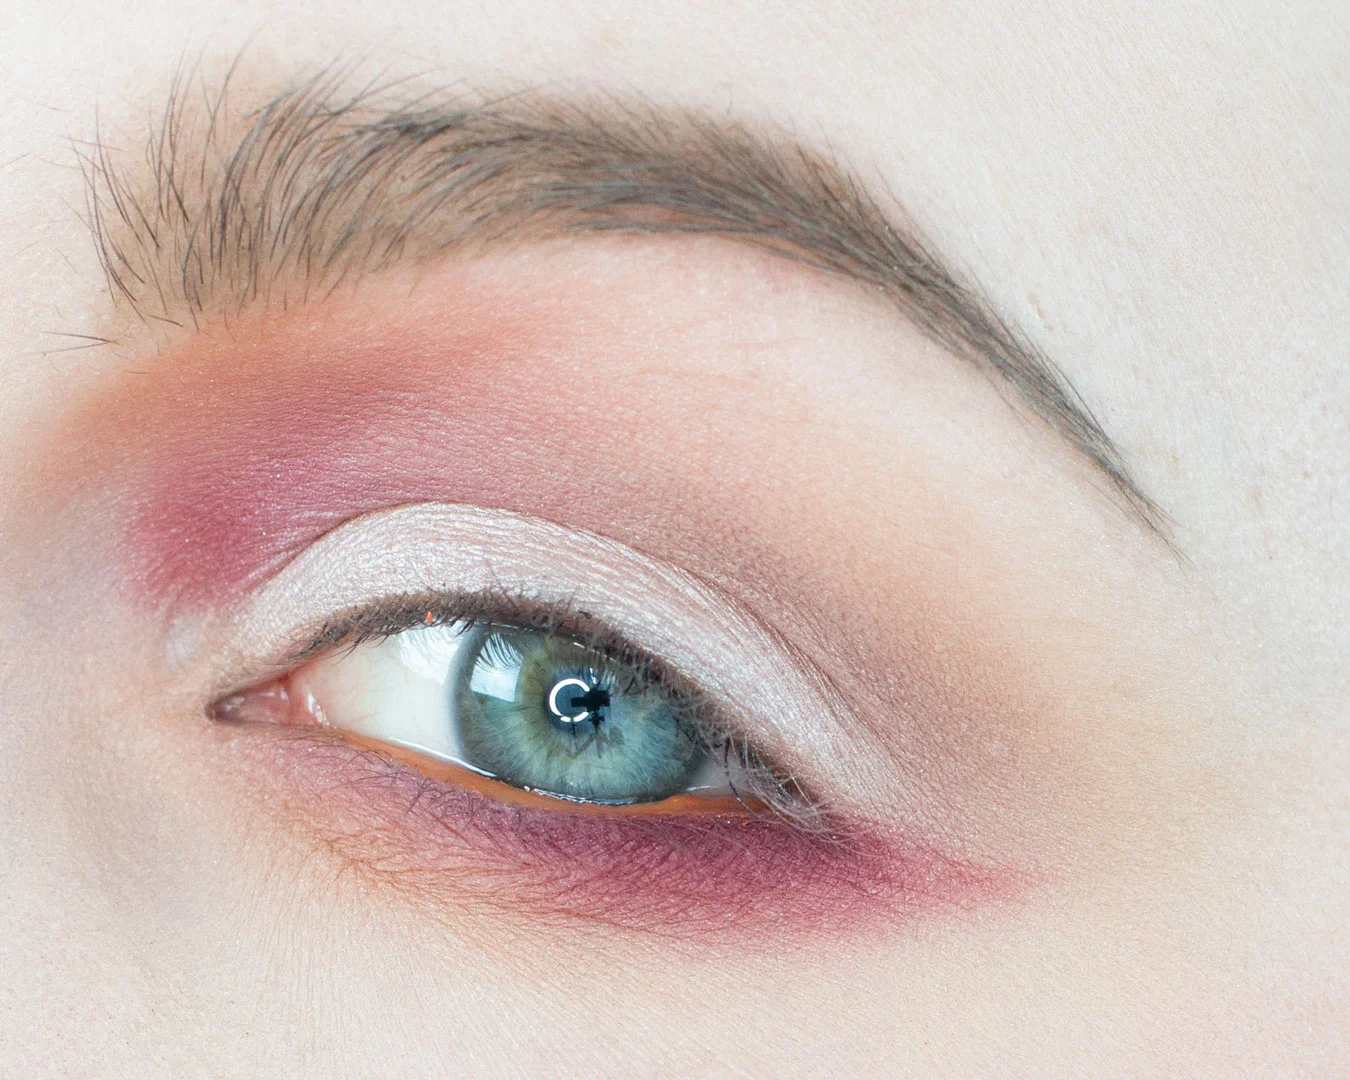
These penultimate steps are really going to be fun, but you can skip straight to adding mascara for a tamer look. I am adding Mac Chromaline in Genuine Orange to the waterline. This pops nicely against blue eyes, if I was applying this to a model with brown eyes I would probably swap it for a royal blue liner.

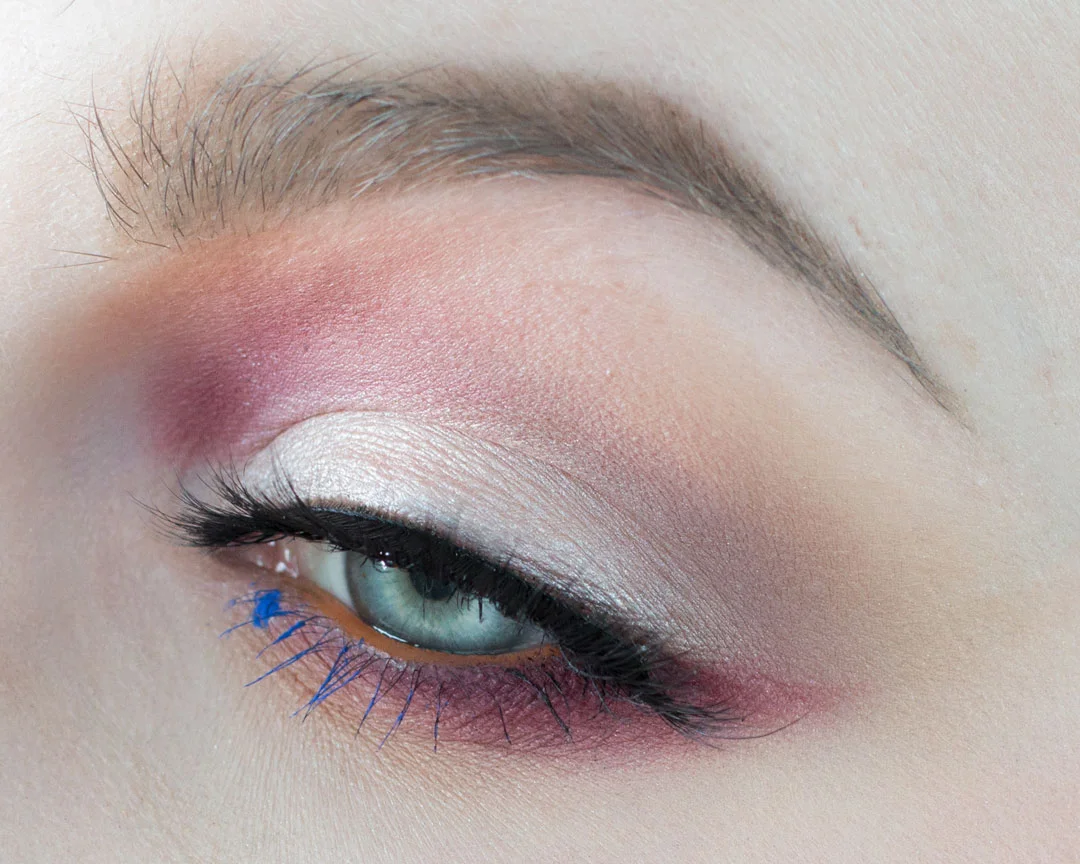
I am now adding MAKE UP FOR EVER Aqua XL Color Paint Shadow in M-20 to the inner lower lashes using a Sigma E17 and I also added a small dot using a nail art tool. I also curled my lashes and added mascara to finish up the eye look. My favorite lash curler is the Tweezerman ProMaster Lash Curler since it works great for deep set or almond eye shapes and my go to mascara is Maybelline Full & Soft Waterproof Mascara.

Here's the final look with all the finishing touches. I added the Nubounsom x Alex Faction Faction lashes. They are one of my favorite stylers of hooded eyes and have a lovely emongated look which I felt compimented all the sweeping shapes in this eye look. If you wanna try out these lashes I do have a coupon code 'rebecca shores' if you want to get 20% off any of the Nubounson lash styles!
Products used

Smashbox 24 Hour Photo Finish Eyeshadow Primer
Maybelline Full & Soft Thick & Healthy Waterproof Mascara
Anastasia Beverly Hills Modern Renaissance Eyeshadow Palette
MAKE UP FOR EVER Aqua XL Color Paint Shadow M-20
Tweezerman ProMaster Lash Curler
Brushes:
Smith 253
Hakuhodo J5529
Sigma E50 - LARGE FLUFF BRUSH
Sigma E17 - WATERLINE LINER BRUSH
Sigma E40 - TAPERED BLENDING BRUSH
Thanks so much for reading! I hope you enjoyed this one palette tutorial using the Anastasia Beverly Hills Modern Renaissance Eyeshadow Palette. If you recreate this look #rebeccakshores so I can see your pretty face. I look forward to chatting the the comments.
-Rebecca


