Night Out Glam Warm Step-by-Step Eyeshadow Tutorial │ Capsule Makeup Collection
Night Out Glam Warm Step-by-Step Eye shadow Tutorial
Capsule Makeup Collection

Here is the third installment in my Capsule Makeup Collection series. This makeup look is a much more dramatic look than the previous two looks. This step-by-step tutorial is for someone that wants a more glamorous look that is still very flattering to most eye shapes.
I imagine this is for the person that is going out for the night on a date, or maybe a ladies night out or concert. Flattering on many eye shapes including hooded eyes. This can also be worn during the day lighter or just as deep as it is here, it’ll all personal preference.
Make sure to enter the giveaway if you want to win some of the the products used! Details in this post!
Disclosure: Some of the links in this post are affiliate links and if you click them to make a purchase I will earn a small commission. I only link to companies and products that I enjoy and would recommend to you. The decision is yours, and whether or not you decide to buy something is completely up to you and thank you if you do use my links and help support me and my blog. This post contains products sent to me for consideration (PR) free of charge from the brand.


You know what’s coming… prime your eyes! I am using the Smashbox 24 hour Photo Finish Eye Primer.
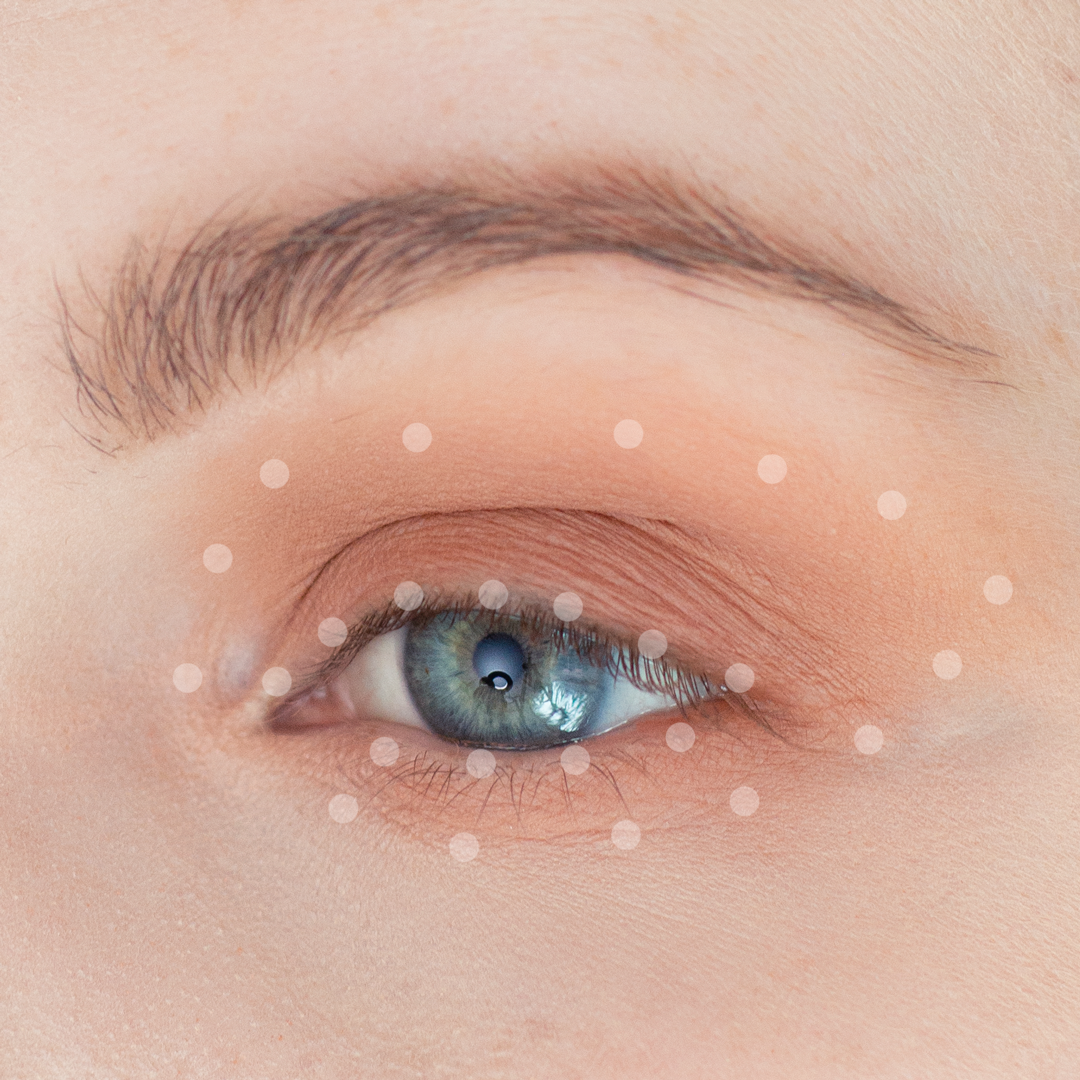
Then apply a base shadow (a shadow that is close to your skintone and matte).
I am using So Pale (off white warm cream, matte) from the In The Nude by Makeup Geek as a base shadow. Apply the eye shadow from the crease and blend up to the brow. I am using a S165 Cozzette brush to apply. With smoky style eye shadow looks a base shadow will really help us get those smooth transitions as we build up layers.


I am using a Cozzette S175 to apply Buffed (mid-toned peach brown, matte) from the In The Nude by Makeup Geek palette as a transition shade. I am bringing up the edge a bit more than in the previous looks to lift my down turned eyes a bit.
Tip: Do you have down turned eyes? Look at your eyes and if you drew a horizontal line across your eye, are the edges of your eyes below the line? If so, you have down turned eyes.

Now to add depth. We’re going to add depth slowly to keep nice smooth transitions.
I am using a Cozzette S175 to apply Tan lines (mid-toned warm brown, matte) from the In The Nude by Makeup Geek palette from the lid and just before where we applied the transition color.
You also wanna drag this along the lower lash line. I still use a Cozzette S175 to apply under the lash line. If you don’t want the look to be quite so heavy you can select a smaller brush to work under the lashes with.


Using a D220 by Cozzette apply Cabin Fever (matte, deep warm brown) from the In The Nude by Makeup Geek from the lash line all over the lid and bringing it up into the crease. Also apply Cabin Fever to the lower lash line hugging the lashes more than the last step.

Blend, blend, blend! I am using a clean Cozzette S165 to blend over all the edges.
You want those shadows just to melt into each other. Any large, fluffy, brush that is clean can do the job of blending. Hold your brush towards the end of the handle and use light circular or bath and forth motions.


Add a bit more depth after blending. Using a D220 by Cozzette apply Cabin Fever from the In The Nude by Makeup Geek from the lash line all over the lid and bringing it up into the crease again. If needed go back with your large fluffy brush to blend even more.

Smoky eyes classically do not have liner, so we’re just going to use the Makeup Geek Black Eye Liner to tight line. Tight lining is when you line the upper water line and into the upper lash line. This is also a great step for those with little lid space that still want the definition that liner can give.
Tip: Look away from where the liner is being applied. If you are doing the outer corner, look down and towards your nose.


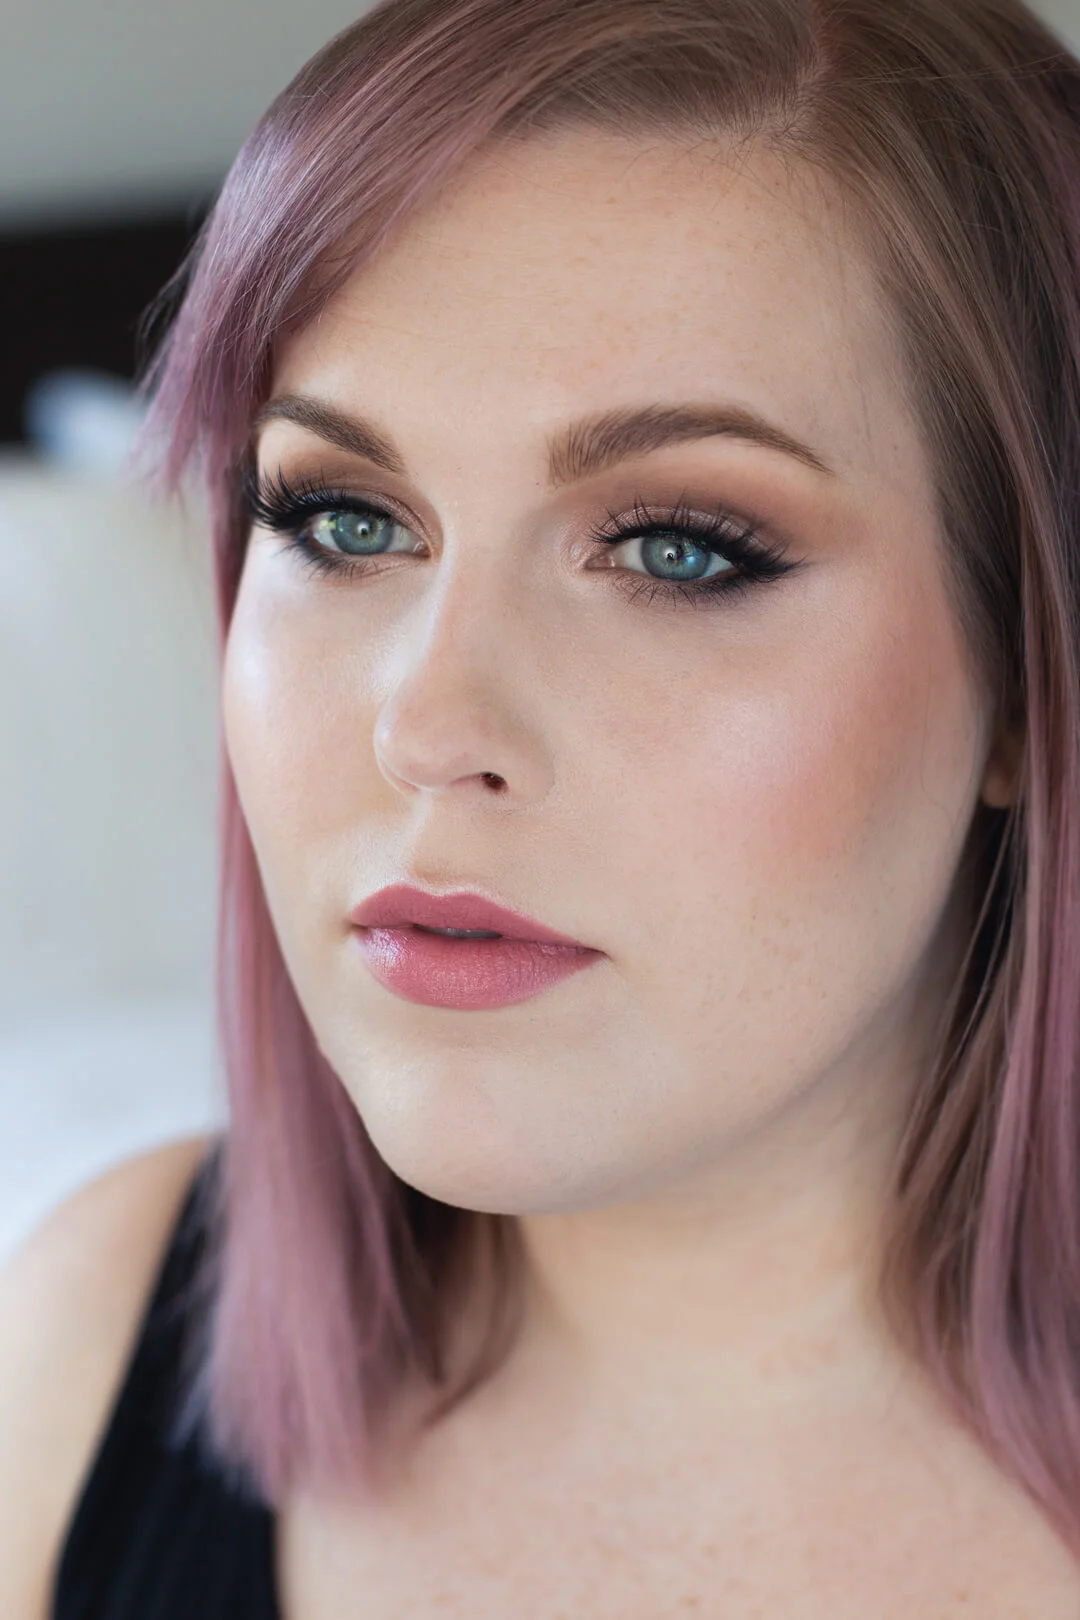
Here is a look at how the final eye shadow look is different depending on if you go for just mascara or for lashes. In the photo on the left I am wearing just Maybelline Full N Soft Waterproof mascara and in the right I have the House of Lashes Iconic Light lashes on.
For this kind of look I would wear lashes. I do like to wear a lighter version of this look (using lighter browns or often oranges) and using just mascara. It’s totally up to you!

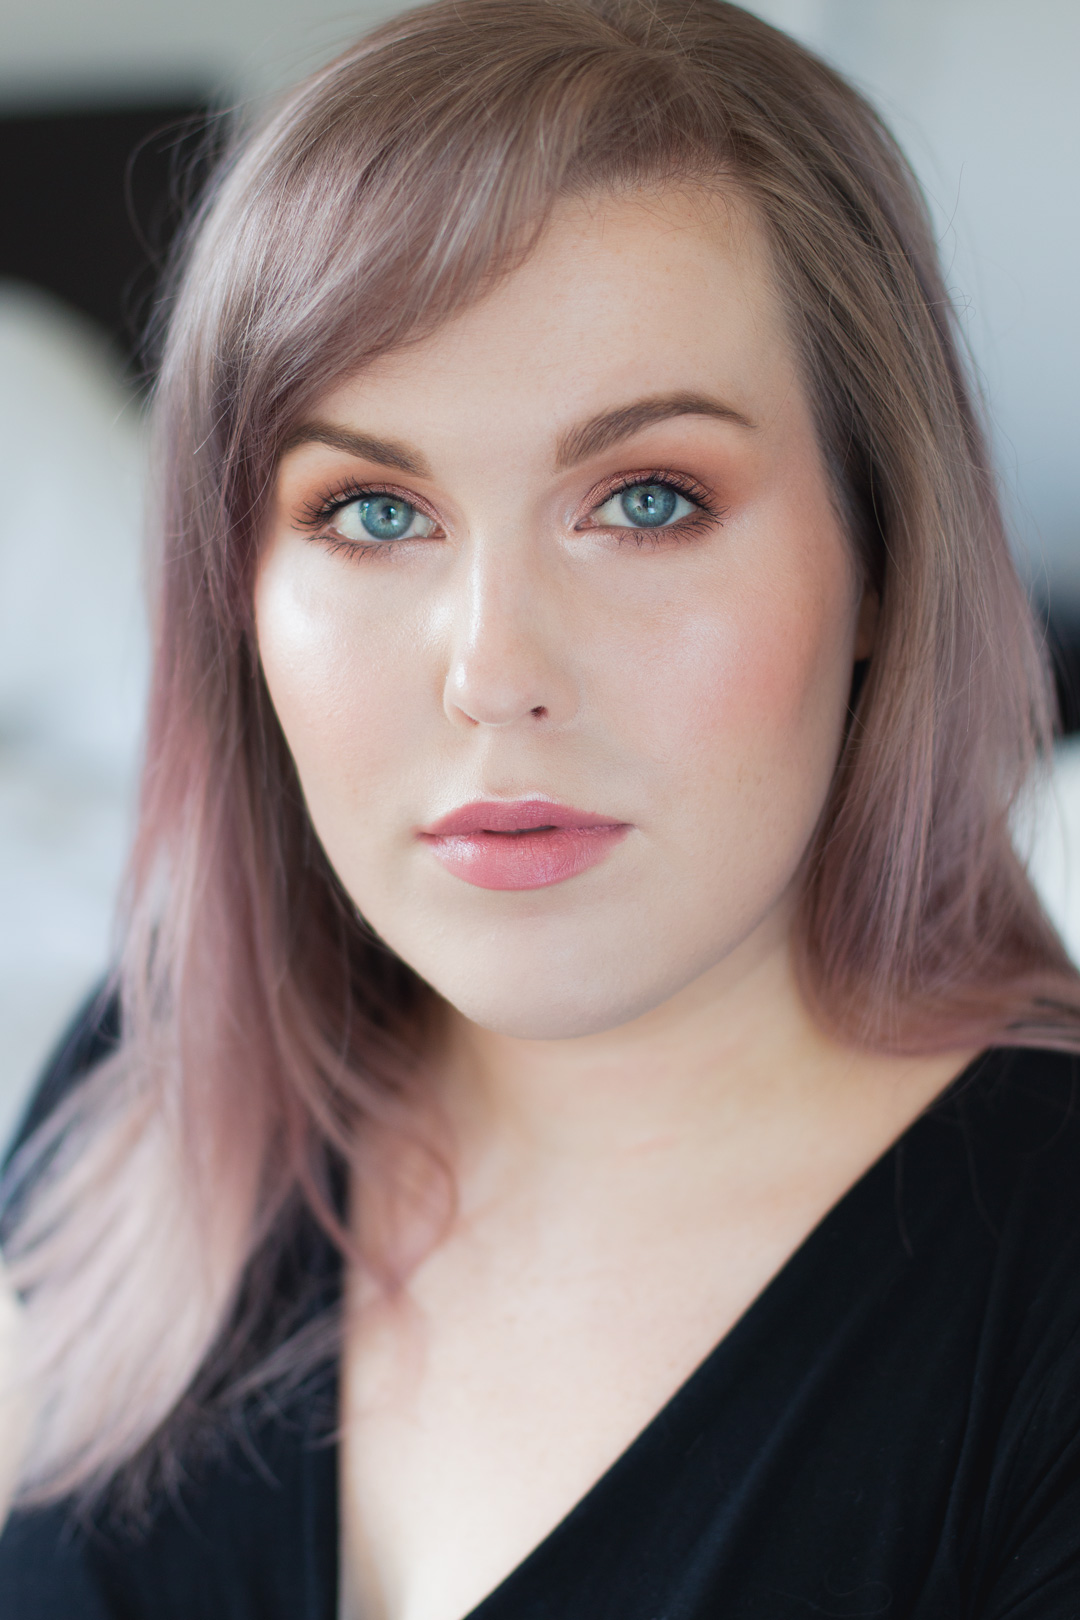
Apply Makeup Geek Cherish blush to your cheek bones blending into the temples. I am using a Cozzette S130 to apply with light circular motions.
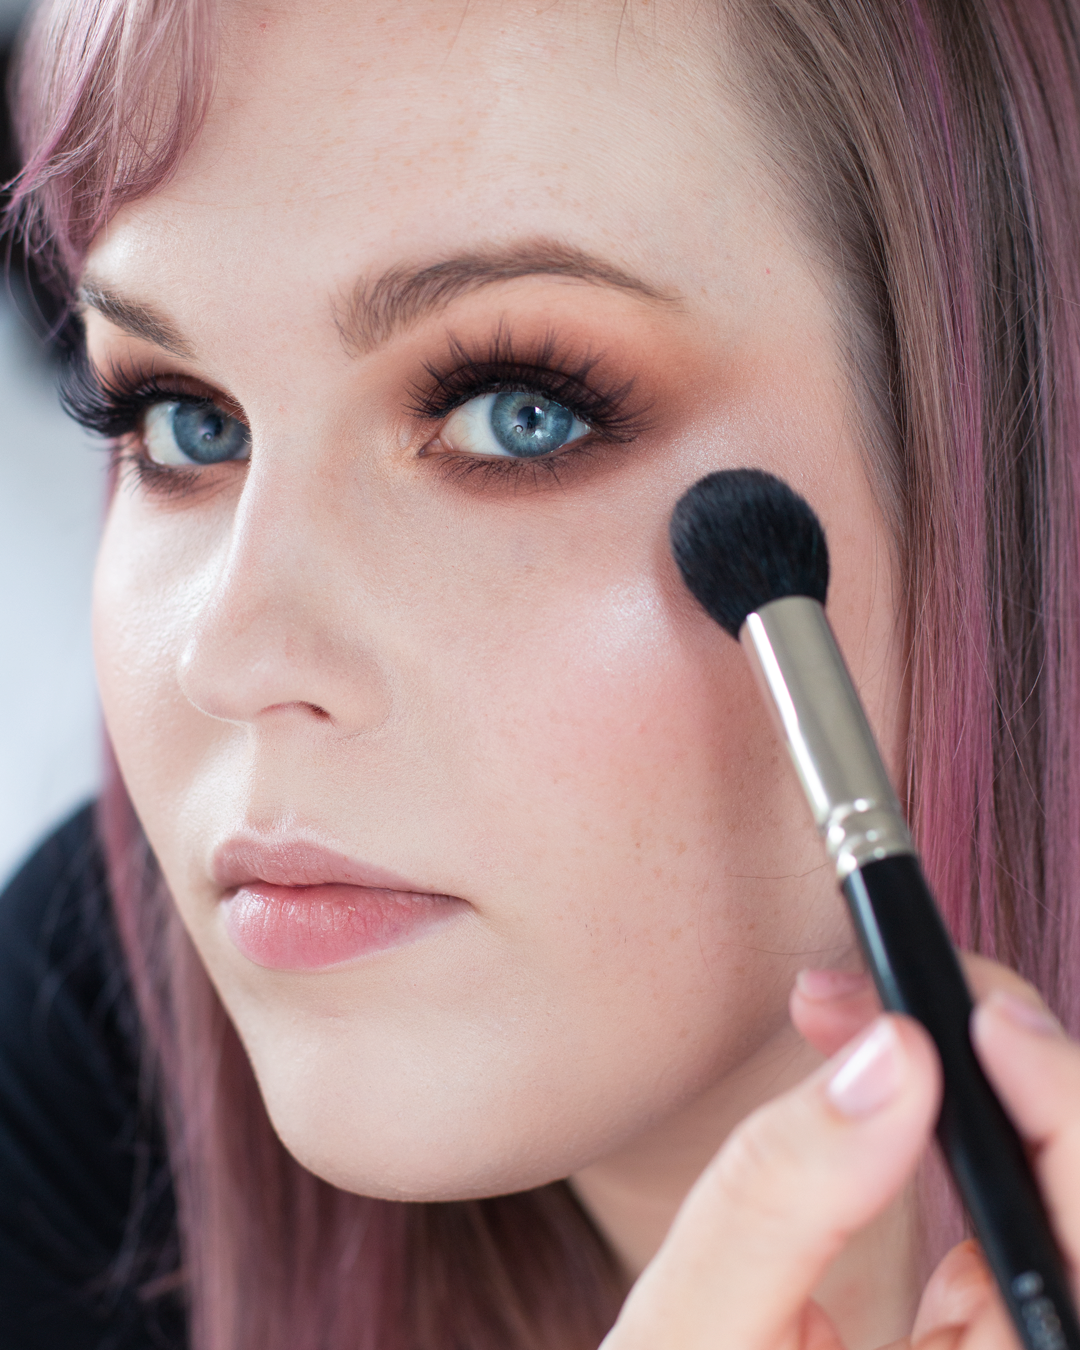
Apply the Makeup Geek Luster highlighter to the high points of your face. I am using a Hakuhodo brush to apply. I like to use small circular motions to apply highlights, especially intense ones like Luster.

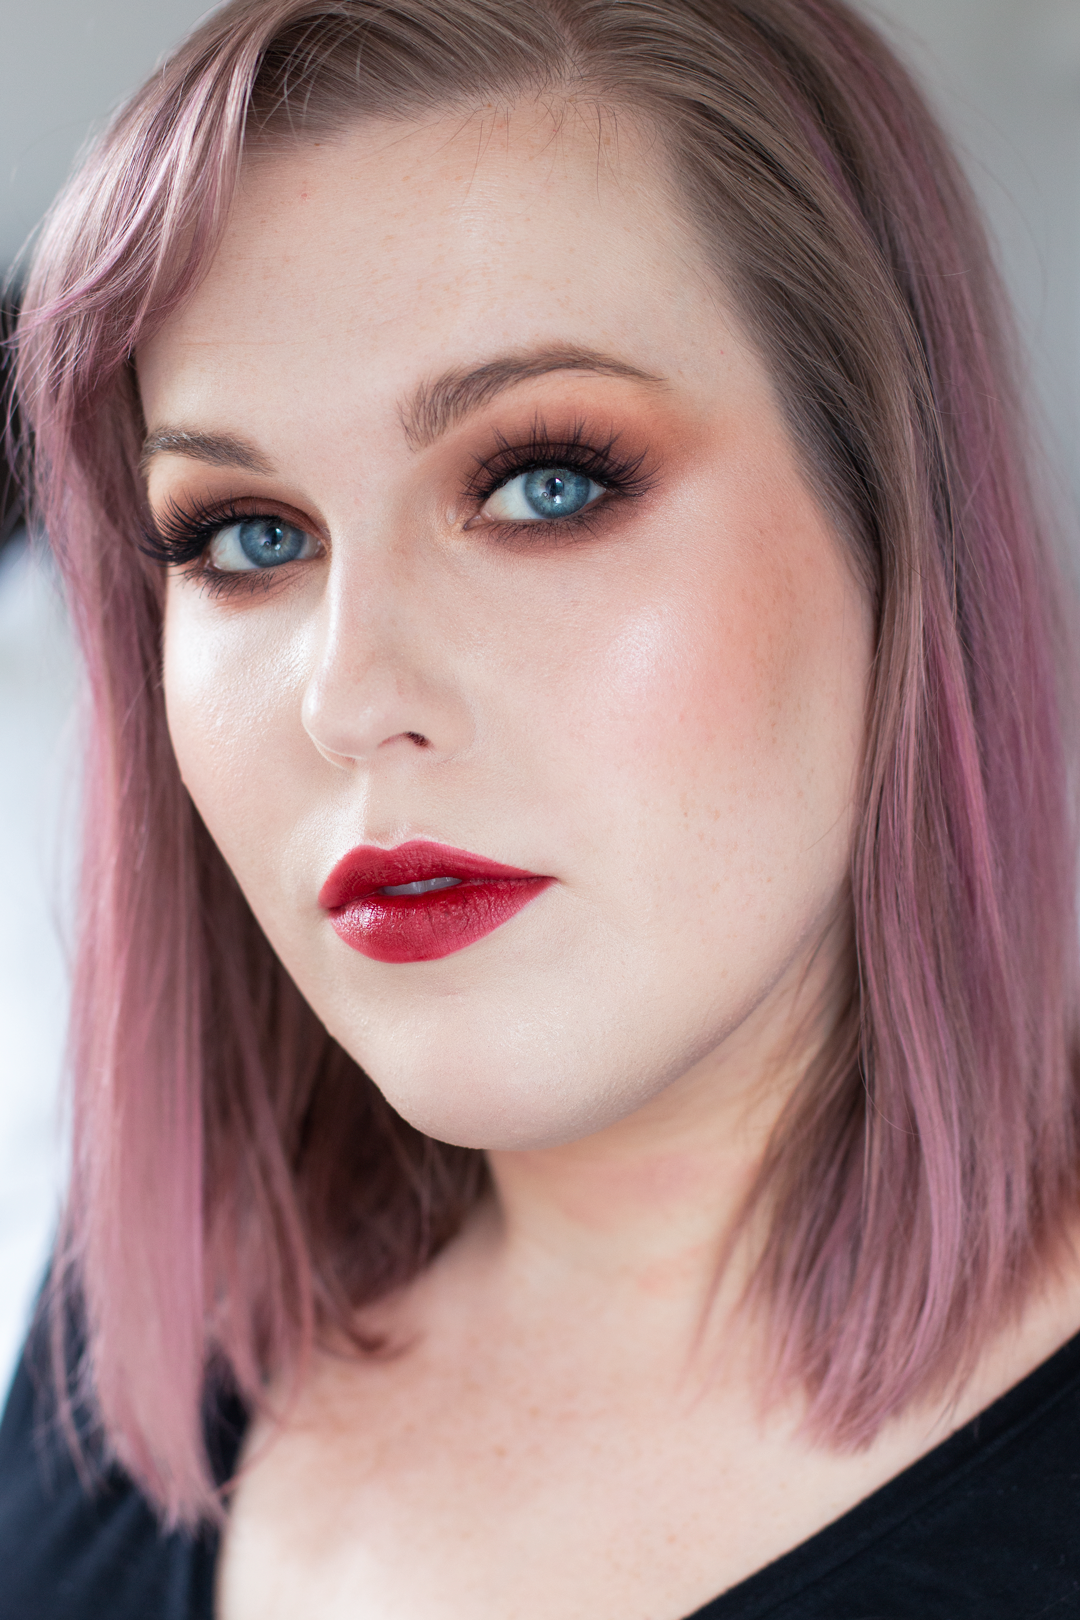
Bold eyes, bold lips!
I am applying Butter London Fired Up to my lips following my natural lip line. I am using a Smith 302 lip brush to apply cause it is my all time favorite lip brush.


Here’s how it looks altogether.
I am wearing items only from my capsule makeup collection. Check this post to see what 15 items I am using for all five of these tutorials. My Foundation is Cinema Secrets 601, concealer is Make Up For Ever Ultra HD in 12 applied under eyes and around nose, Pixi Brightening Peach to help with under eye darkness. I finished the look with Urban Decay All Nighter Setting Spray to keep my makeup looking fresh all day.
This is the look I like to wear on nights out when I don’t wanna spend a whole lot of time on getting ready (or if i wanna curl my hair haha). It’s not too fussy and it pretty quick to put on. I like to switch up the colors for a more colorful smoky eye or swap the red lip for a bright pink if you wanted to add an accent color to your capsule.
I hope you enjoyed this step-by-step tutorial. Keep an eye out and sign up for my newsletter so you don’t miss next weeks tutorial. If you want to win some of the items I am using click here to enter my giveaway! Let me know in the comments where you’d wear this look!
Best,
Rebecca